
Blog / Guides
Step by step: Setting up the Offerwall from MyLead
This article is updated regularly
Last update:
25 August 2025
How to configure Offerwall Rewards? Here is a step-by-step guide to help you fully utilize the potential of this feature.
STEP 1: Start the configuration
After logging in, go to the Tools tab on the left side of the publisher panel. Navigate to the Offerwall Rewards tab.
Once opened, you will see the option "Add OfferWall Rewards". Click on it to start the configuration or click the button at the bottom.
STEP 2: Name your configuration
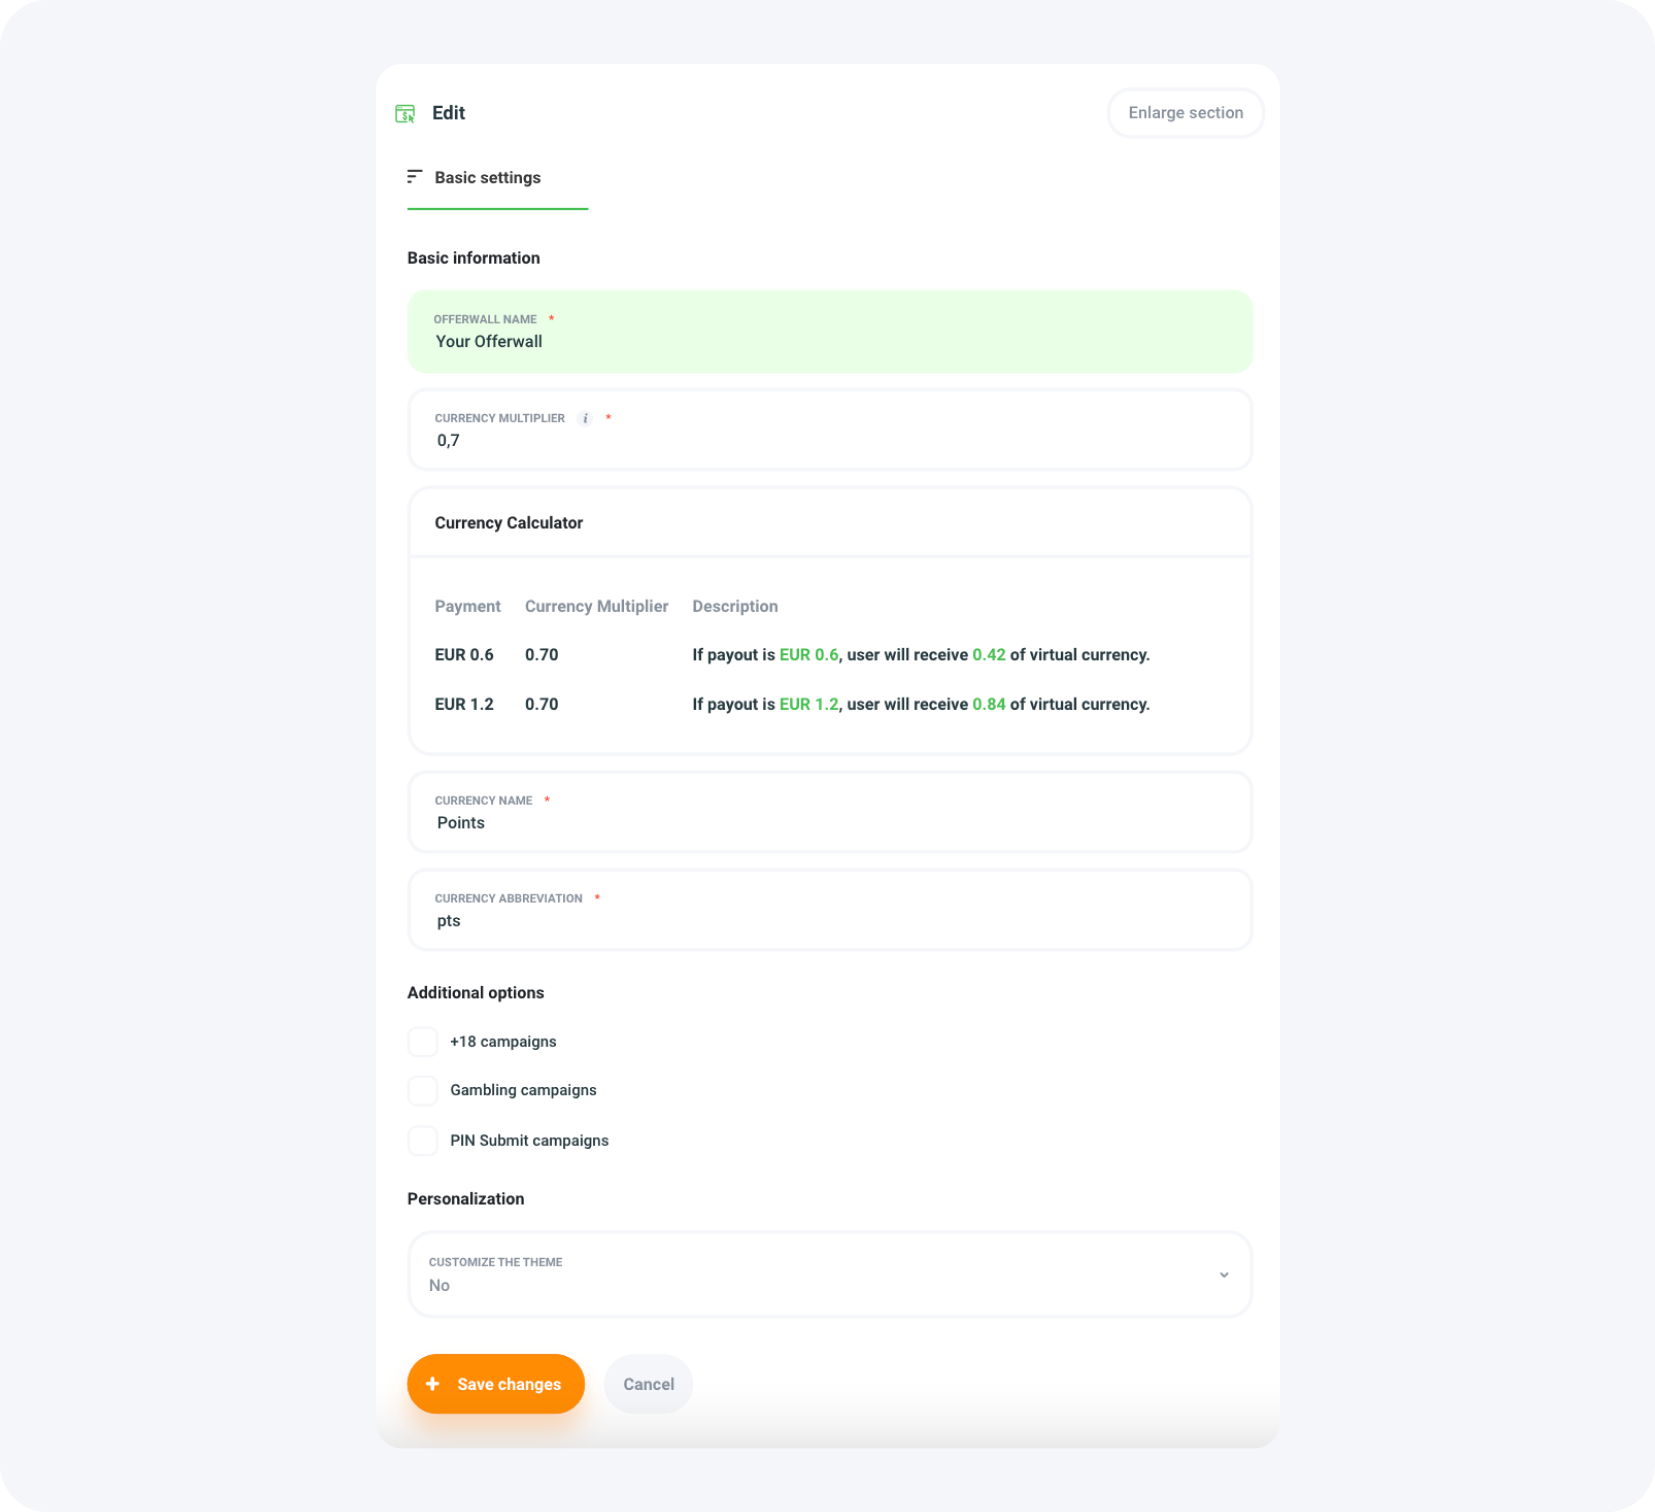
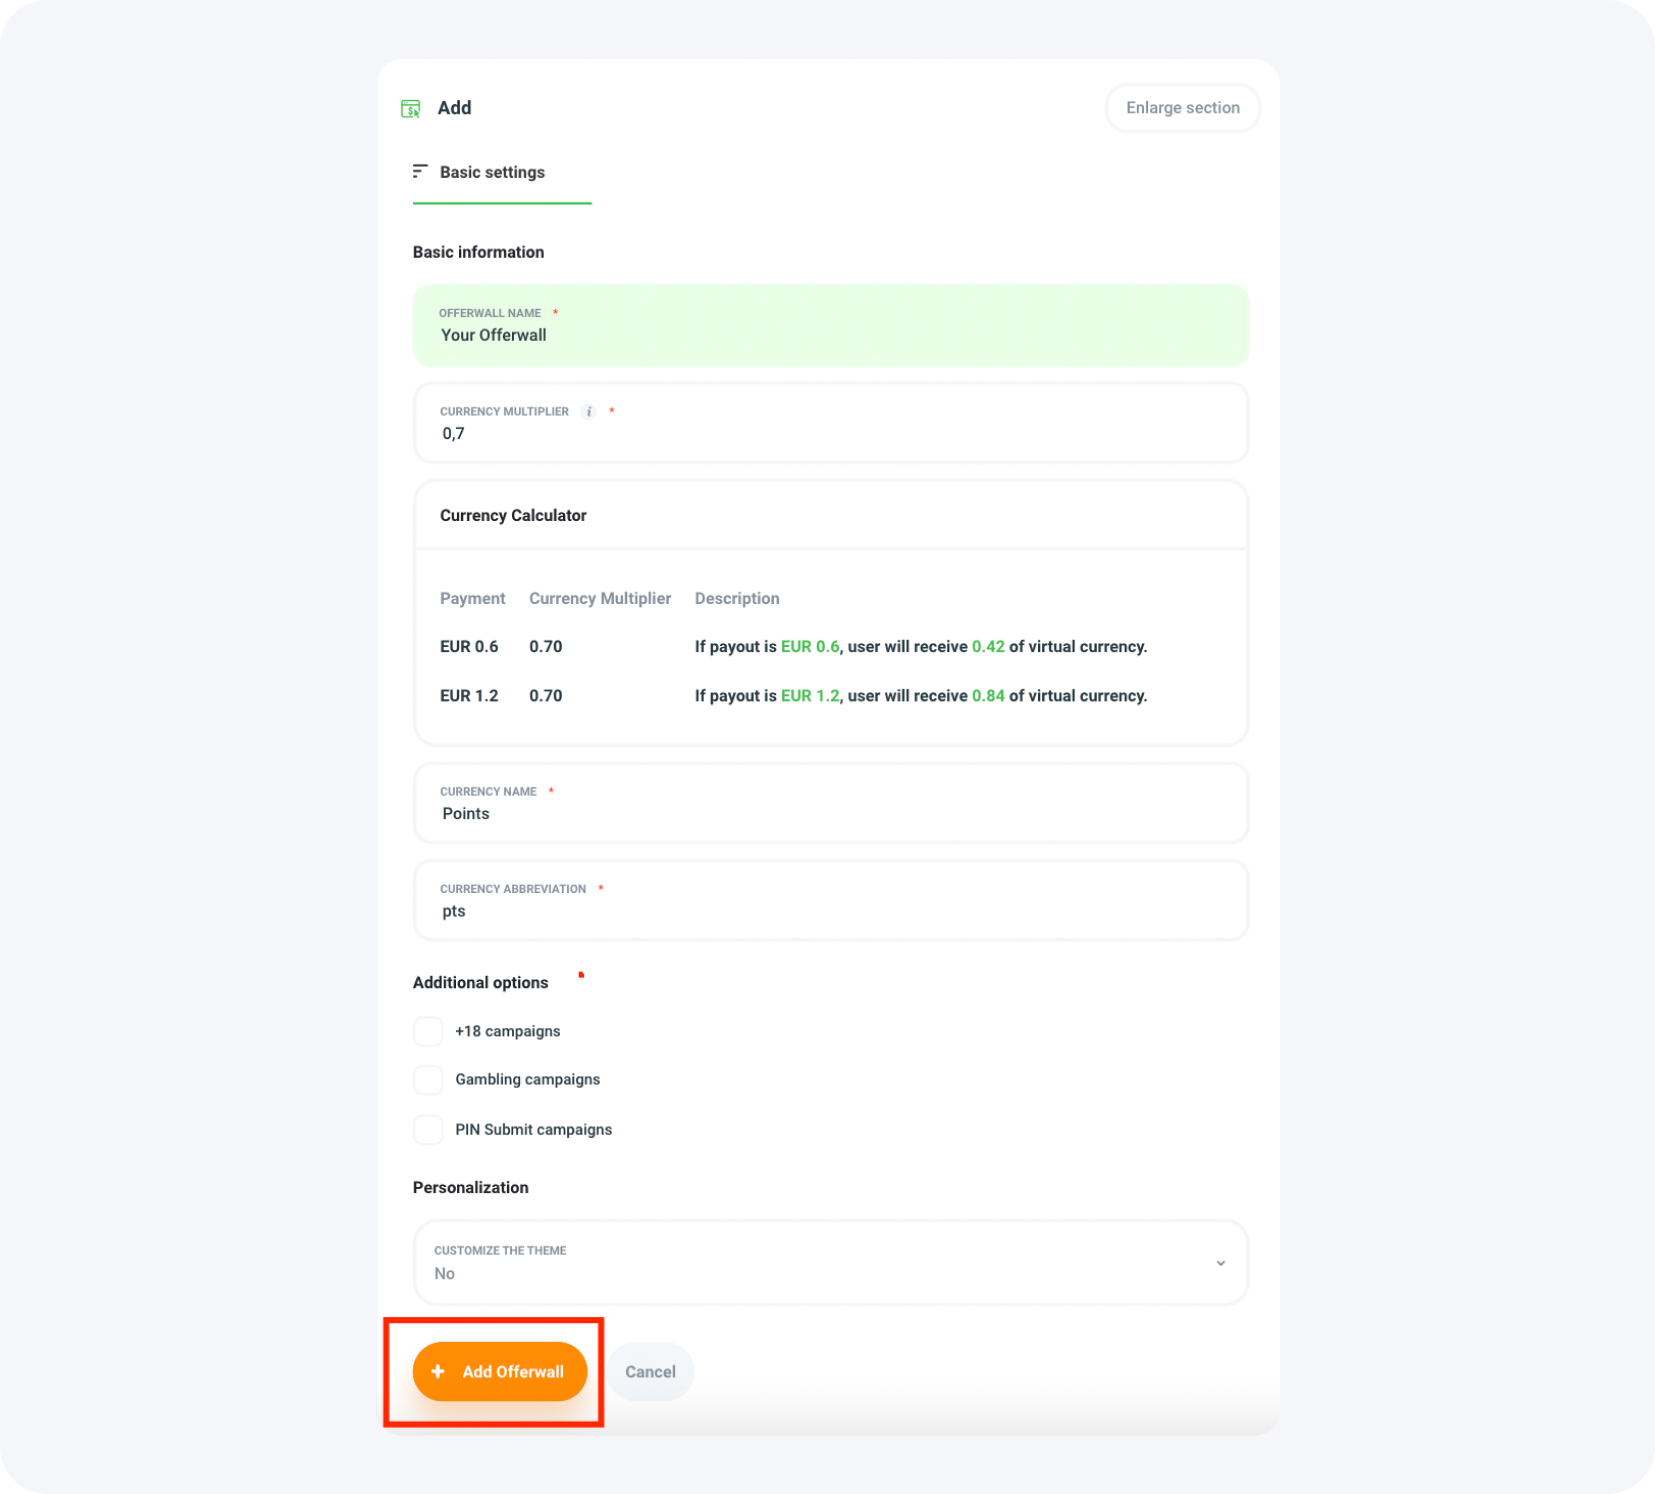
After launching the configuration, enter the name of your Offerwall. Choose a name that will easily identify it, especially if you have multiple configurations.
STEP 3: Name your currency and choose the conversion rate
In the next step, you'll see the option to choose the currency conversion rate. This is a crucial element that affects how points are converted into currency value.
Points are calculated based on the publisher's currency. For example, if your currency is EUR, points will be expressed in cents. The currency conversion rate determines what percentage of points the player will receive.
Assuming the conversion amount for an offer is €5. If you set the conversion rate to 0.7, the player will see 350 points on your Offerwall (500 points in cents * 0.7 = 350).
If the player converts, you'll receive €5, and the player will get 350 points, equivalent to €3.50.
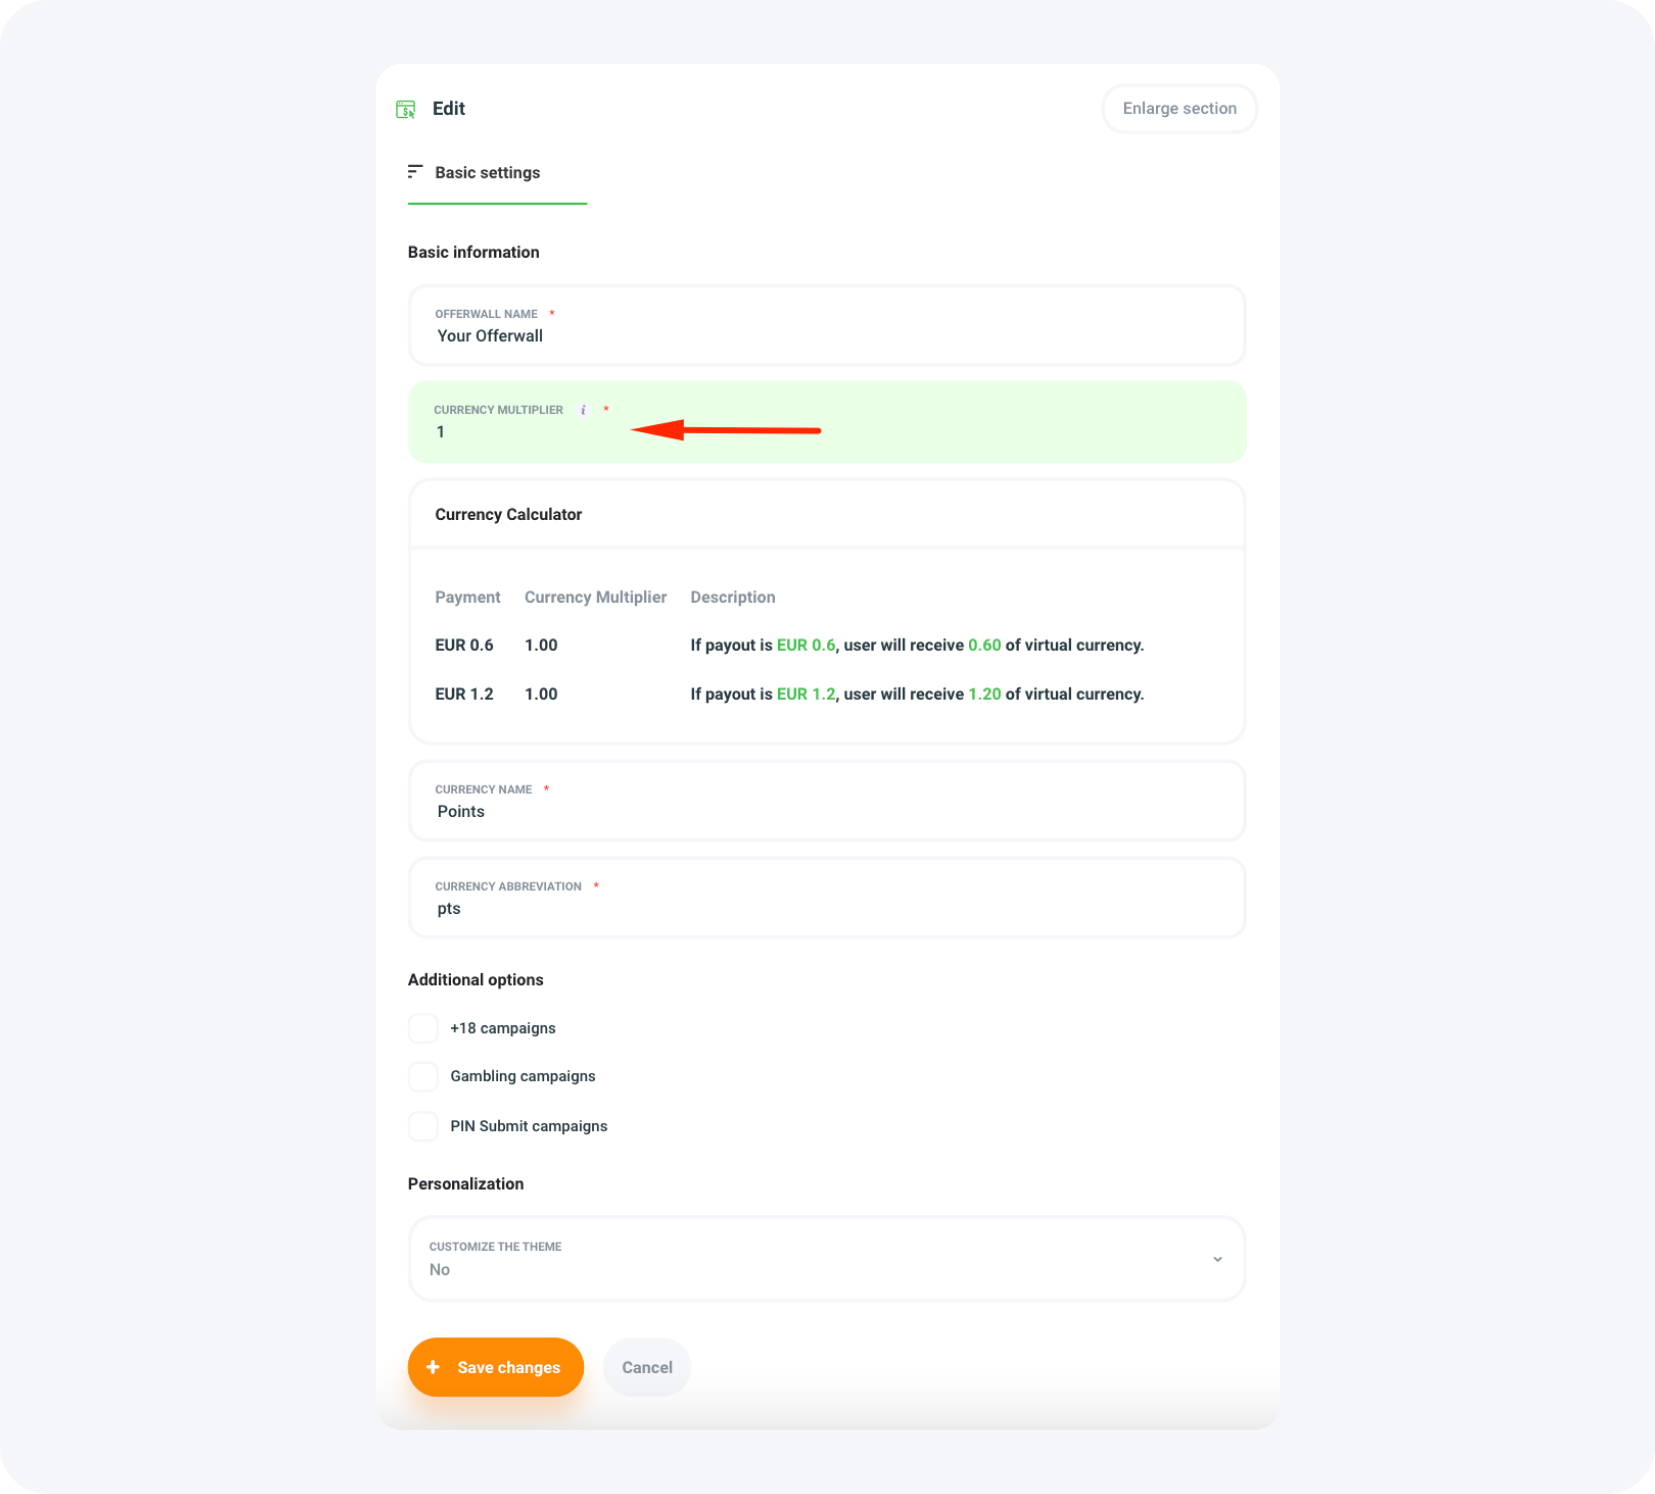
An additional option available on the Offerwall is the customization of the name of the points received by customers. Additionally, you can customize the abbreviation of this name according to your preferences.
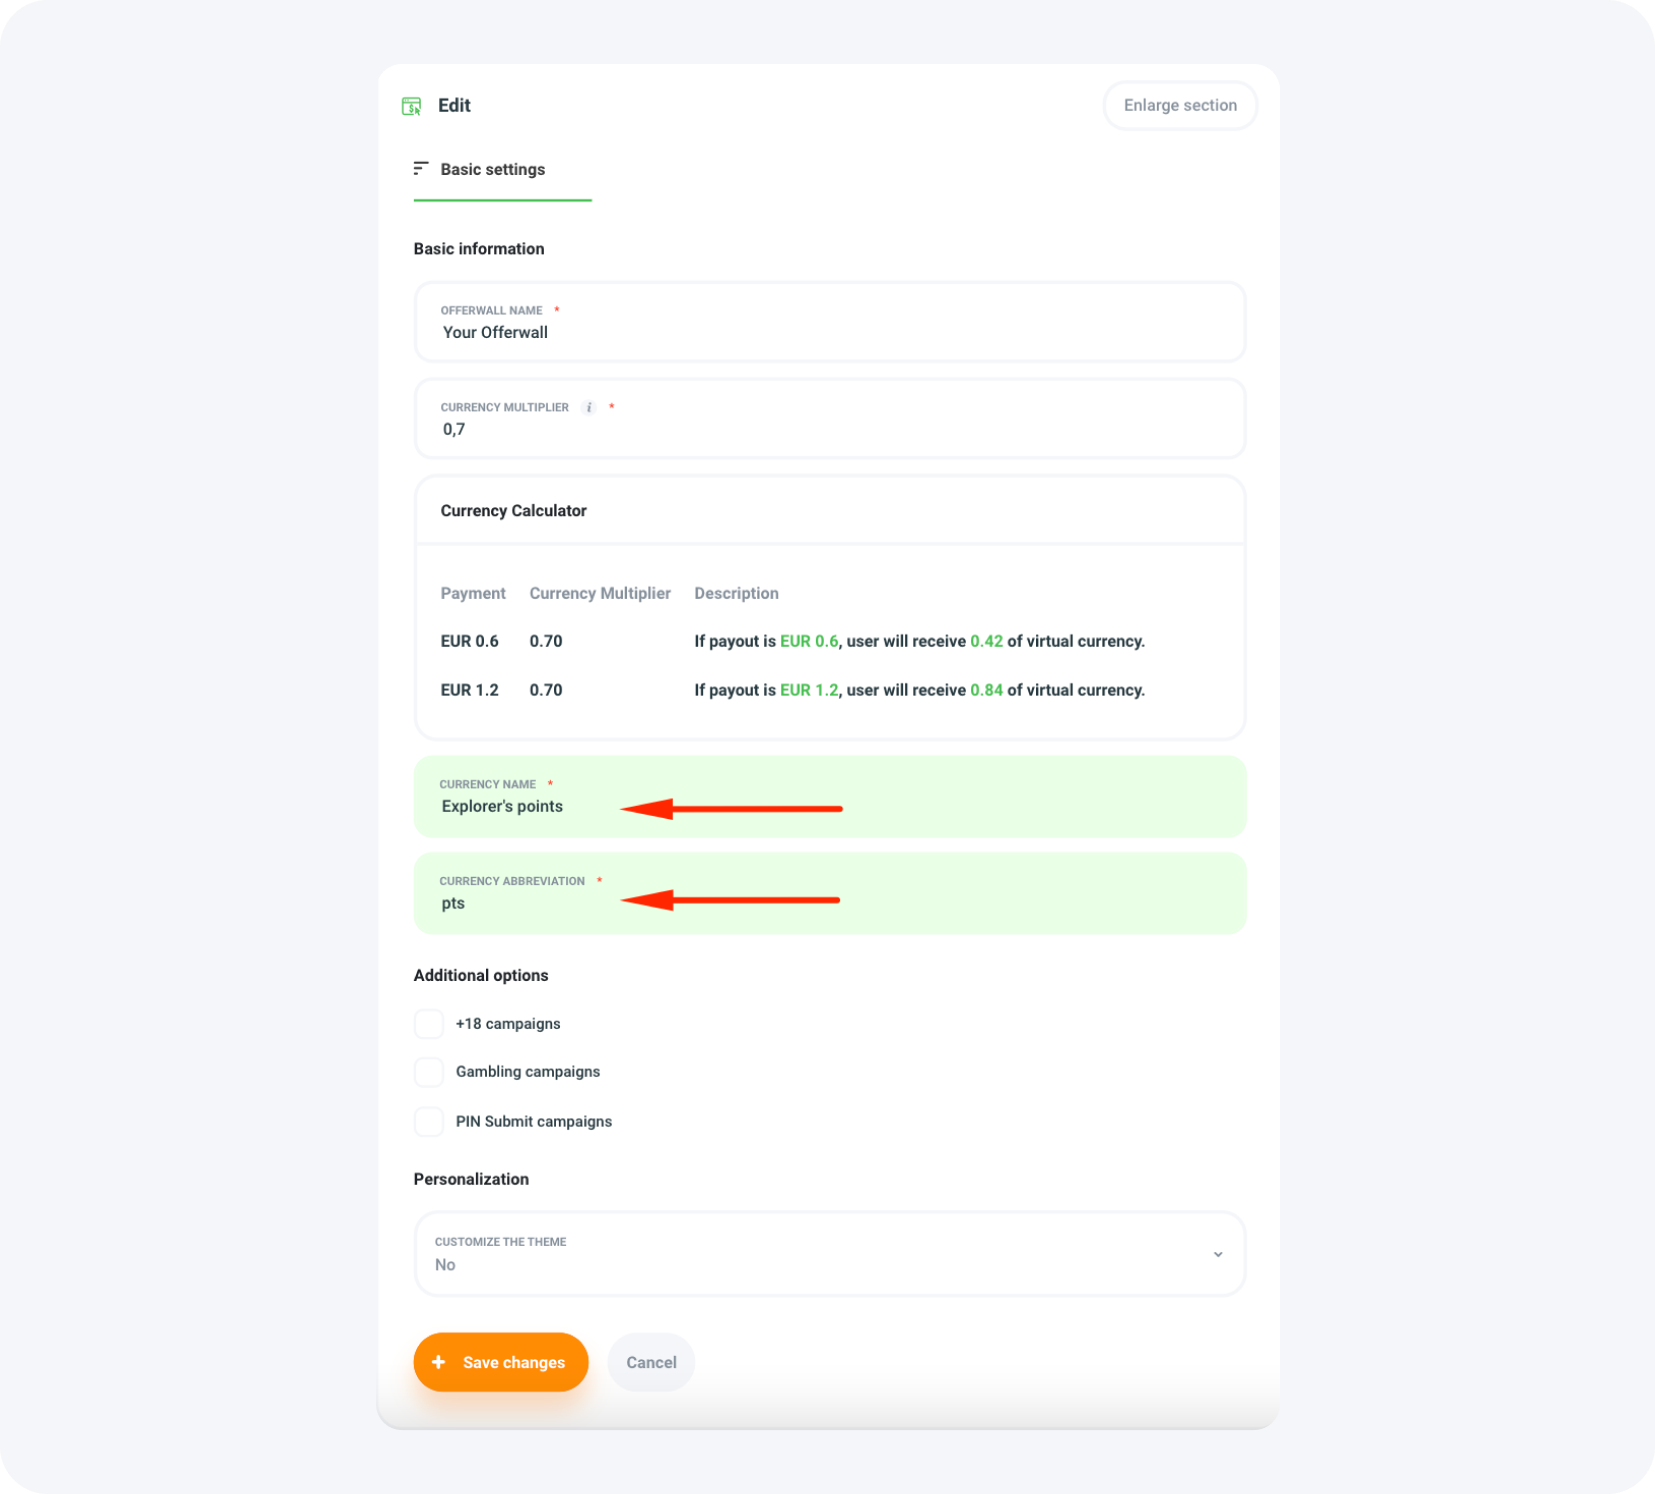
After customizing the name of the received points and adjusting its abbreviation, you can also choose additional options such as displaying adult, gambling, or PIN Submit campaigns on your Offerwall.
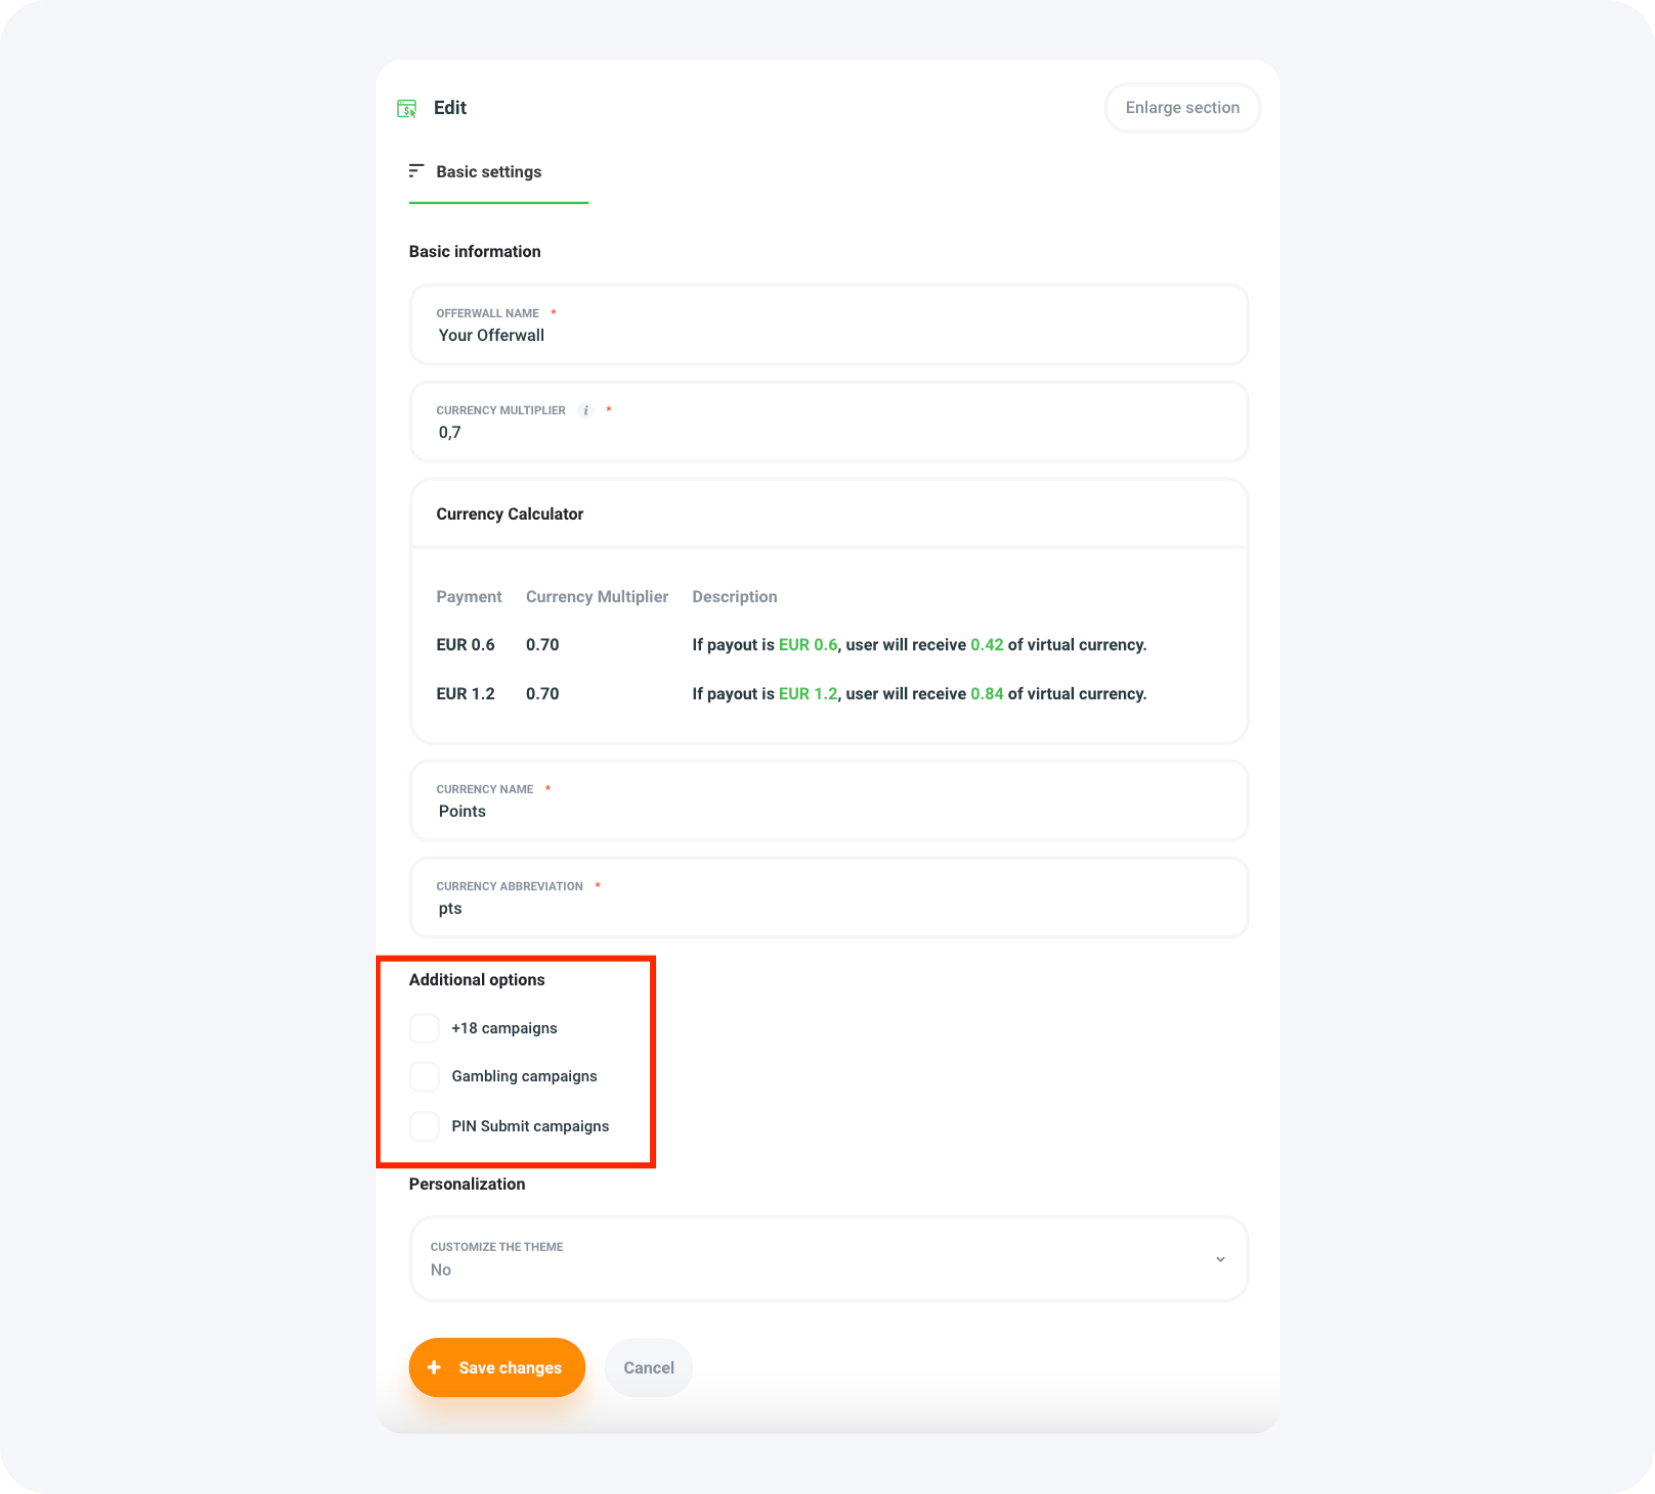
STEP 4: Customize the look of your Offerwall
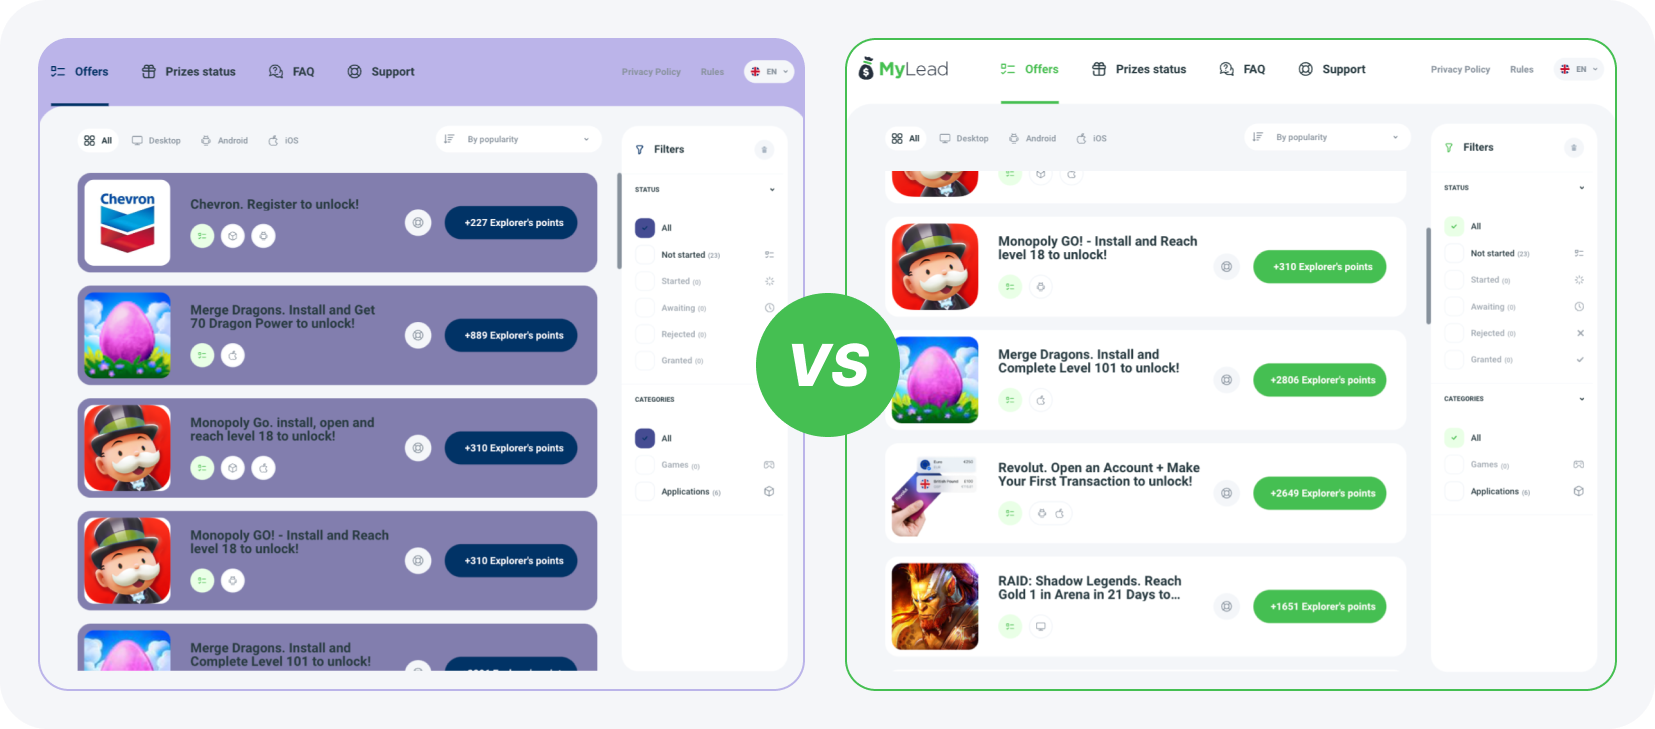
In this section, you can tailor the appearance of your Offerwall to the aesthetics of your website or application, increasing attractiveness for users. You can leave the default layout visible on the preview to the right or remove MyLead's graphic elements and choose your currency icon while customizing the colors of all elements.
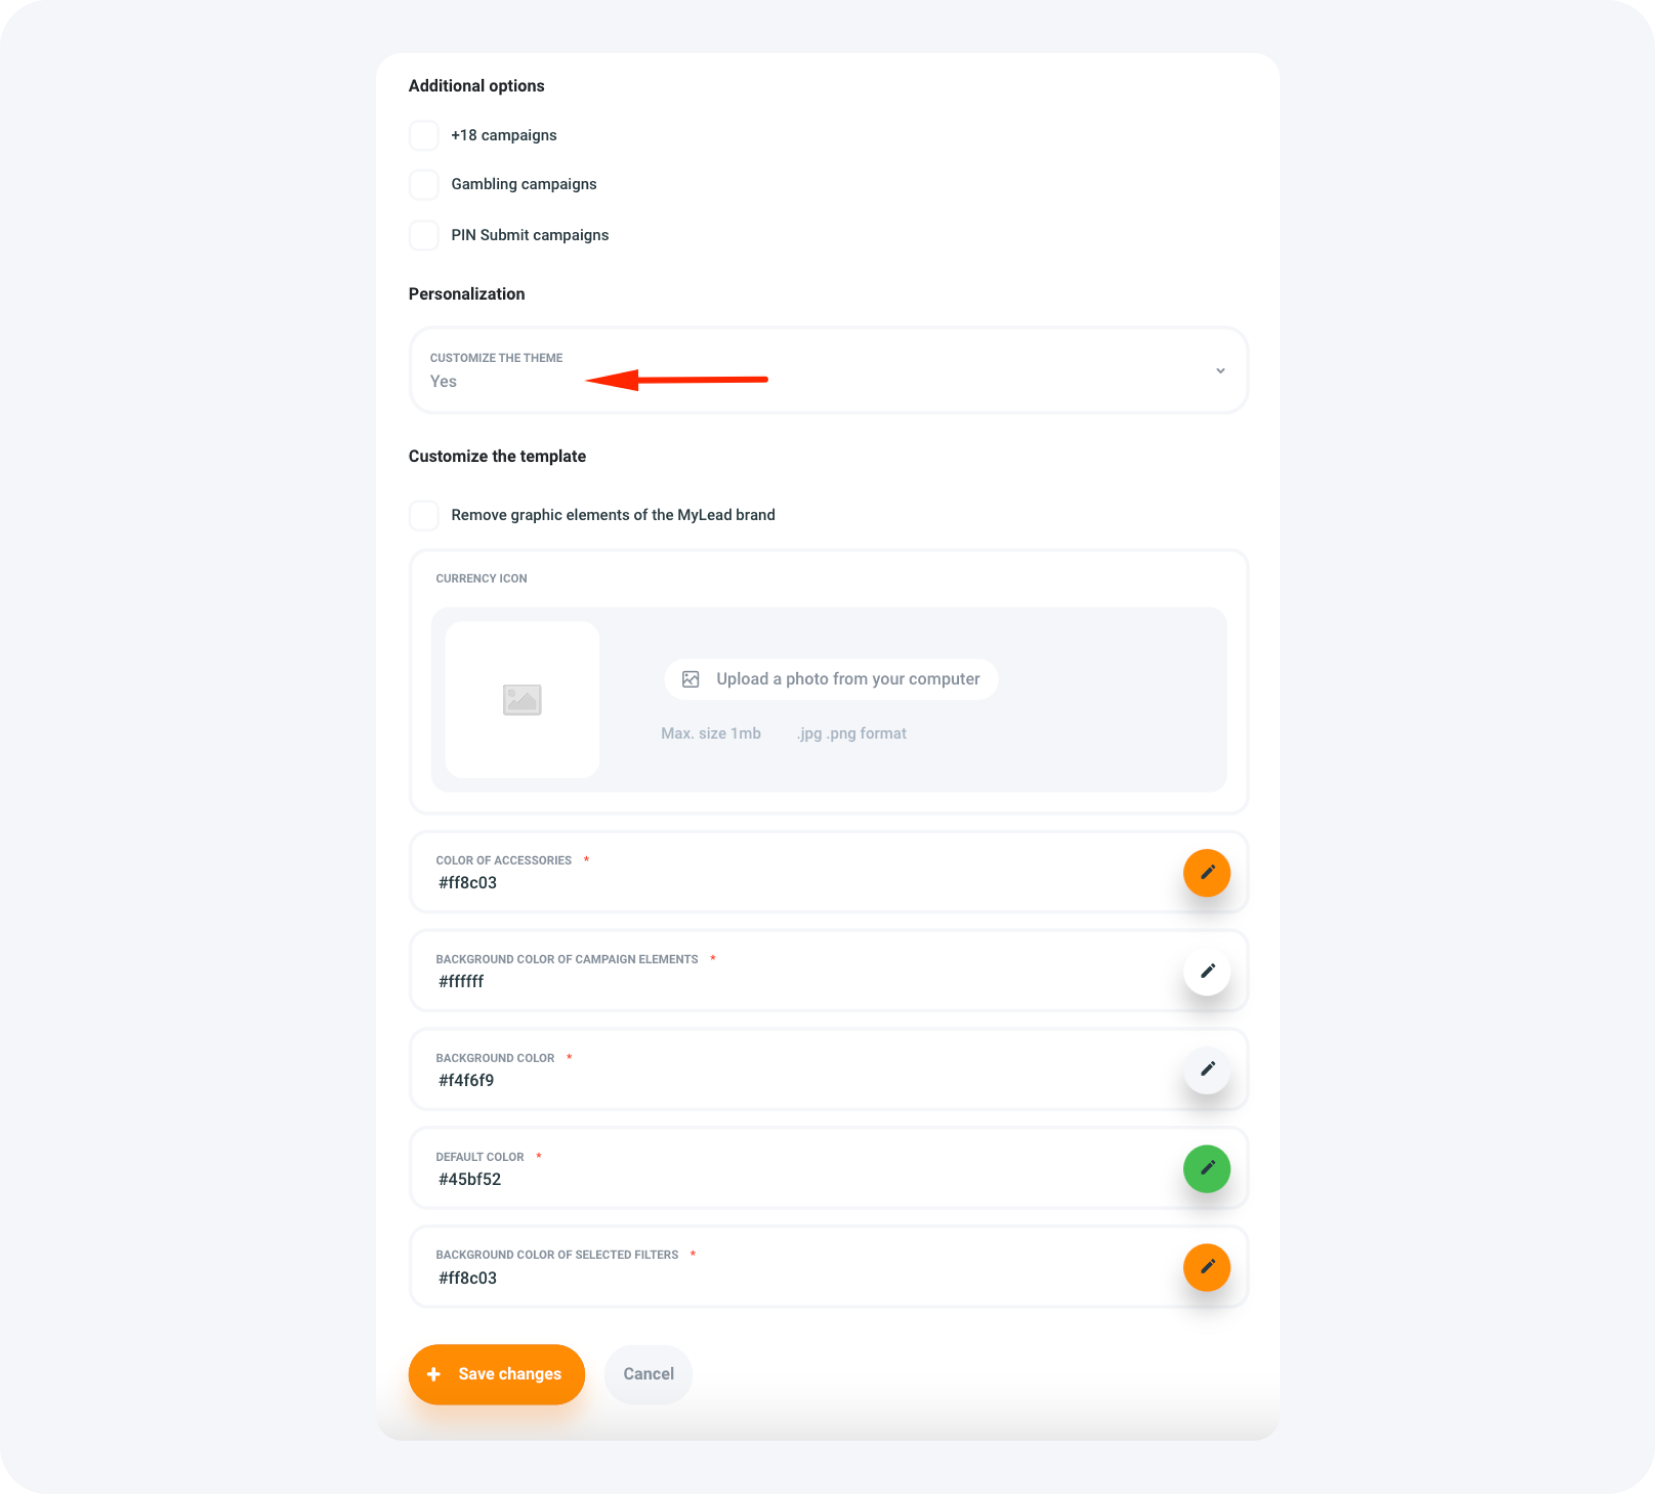
Thoughtful color choices can significantly impact the effectiveness of youe promotions. So, adjust the Offerwall's color scheme to your site or app to maintain consistency and make users feel that it's an integral part of your portal.
STEP 5: Finish configuration
Complete the configuration by clicking the orange Add Offerwall button.
STEP 6: Choose offers for your Offerwall
You have full control over the offers displayed on your Offerwall. After adding the configuration and going to the view of created Offerwalls, you can choose offers. Select the Automatic mode for our proprietary system to automatically select high-quality and popular offers tailored to the user's location and device type.
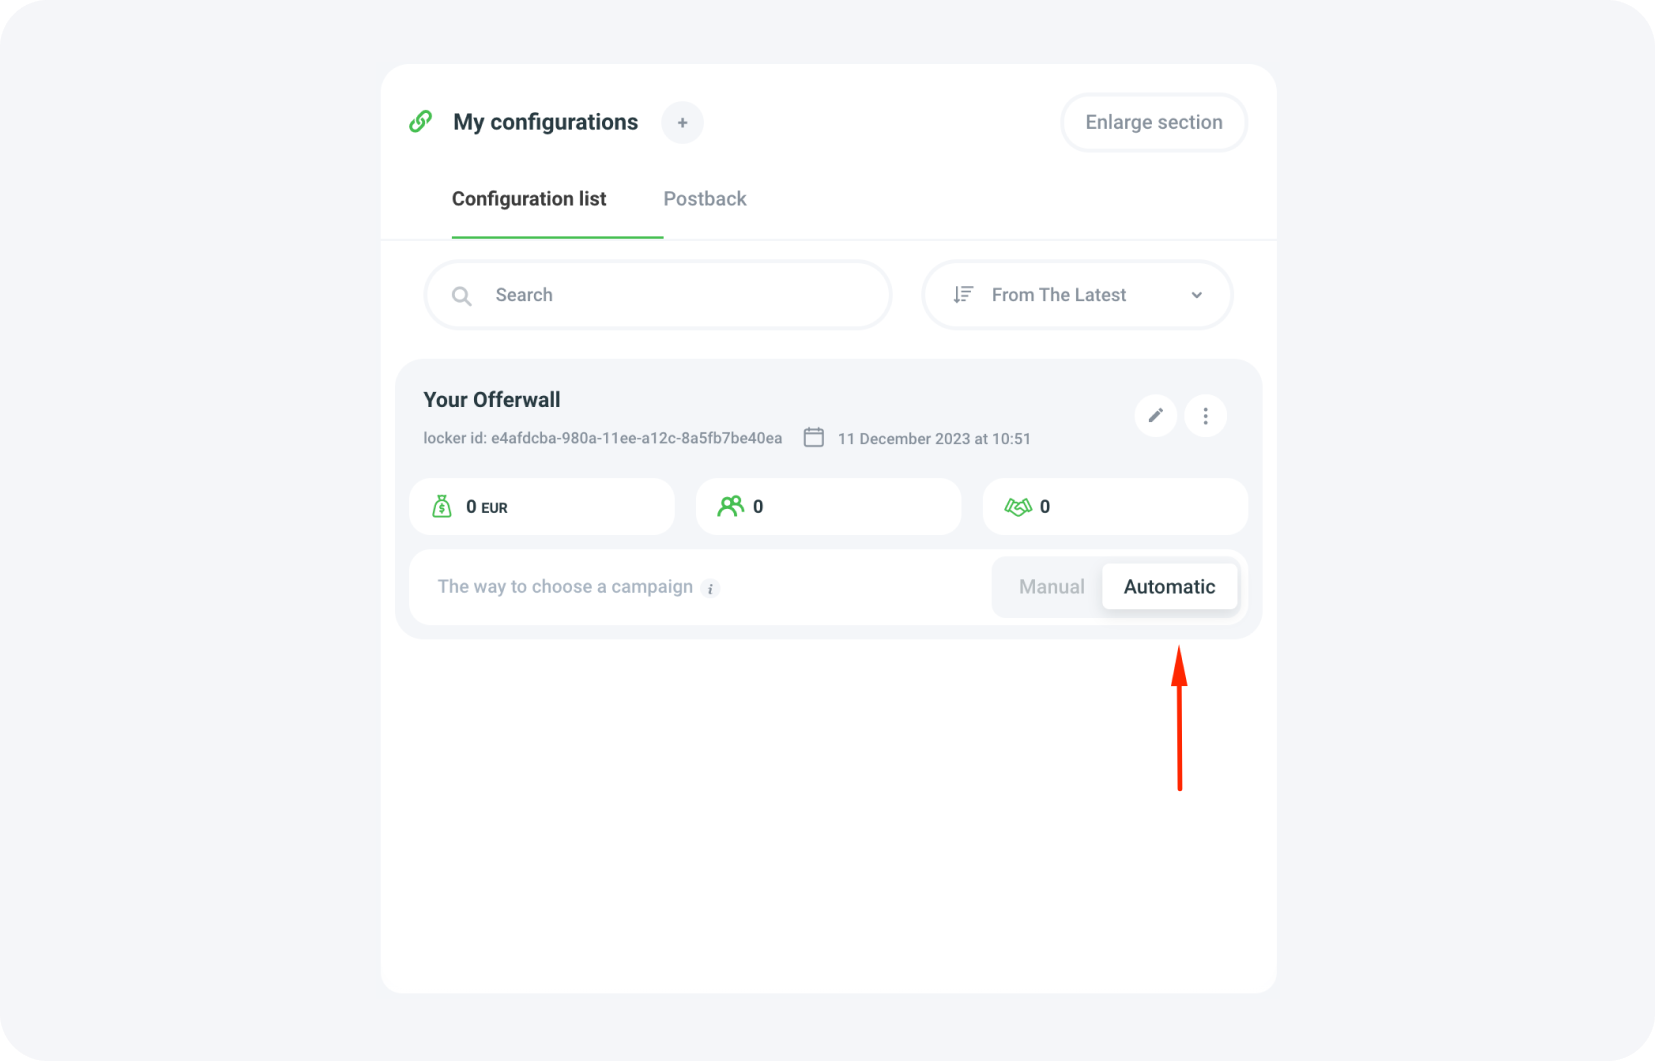
If you want to manually match campaigns displayed on your Offerwall, choose the Manual mode.
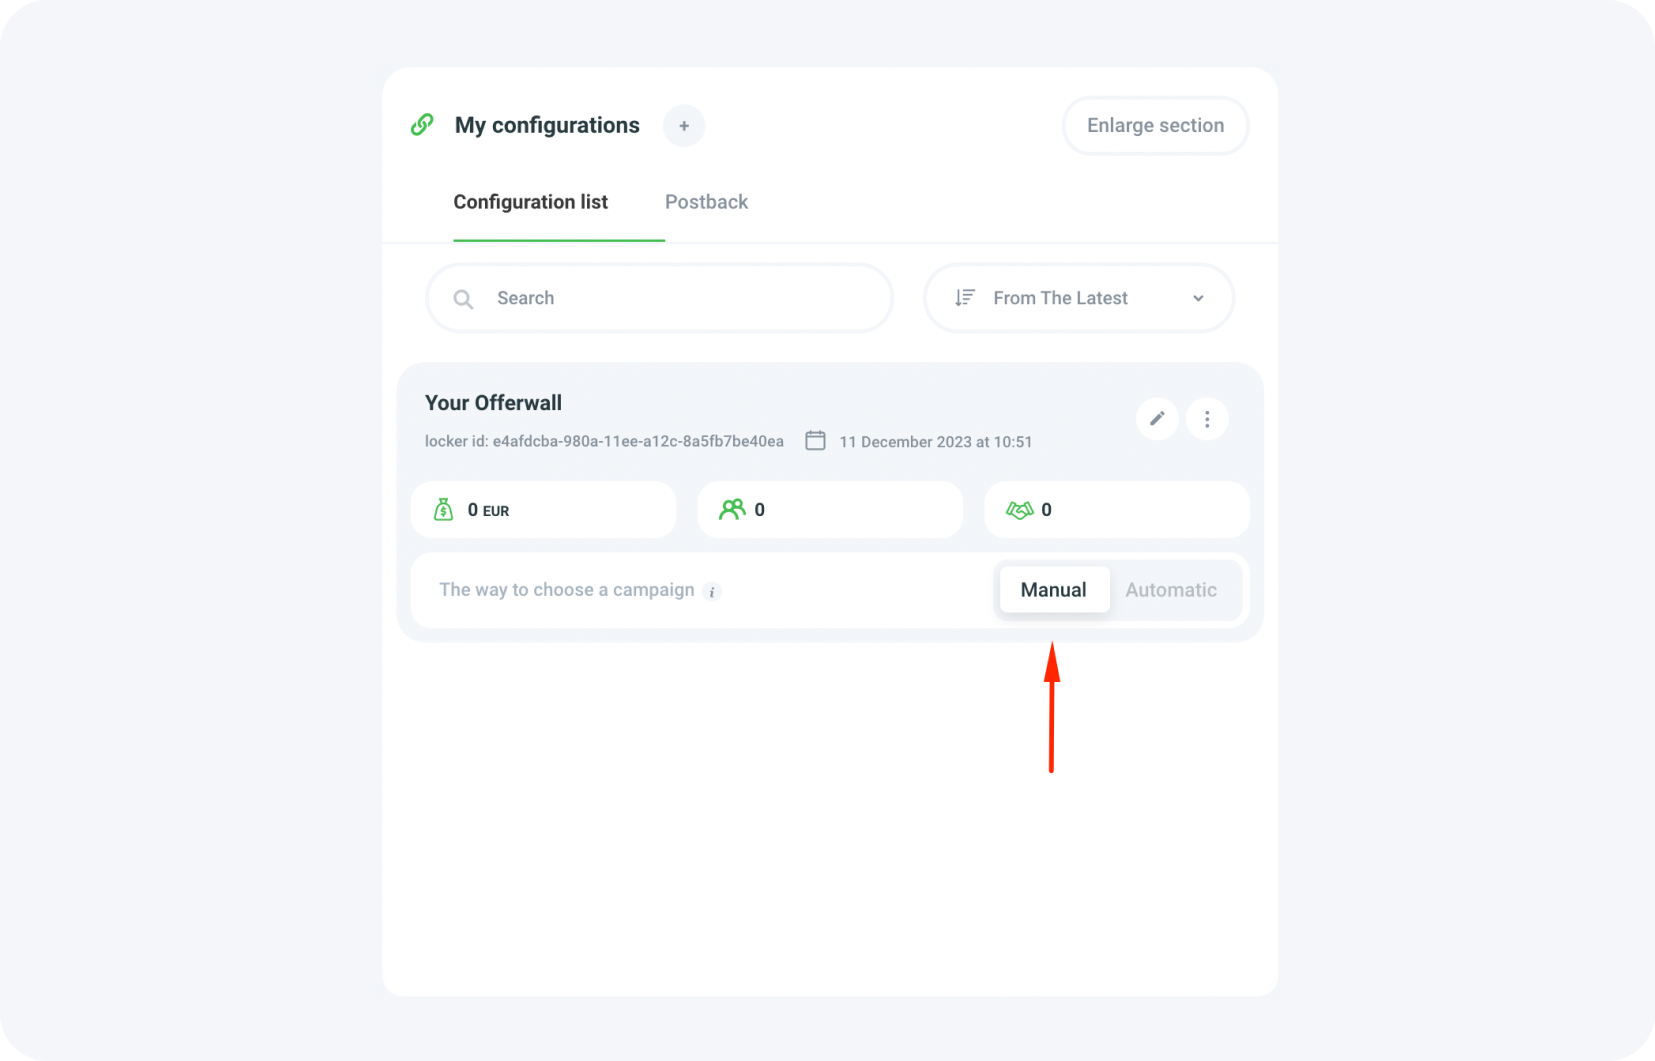
Now you can freely choose from various categories, countries you want to focus your promotion on, or the user's device.
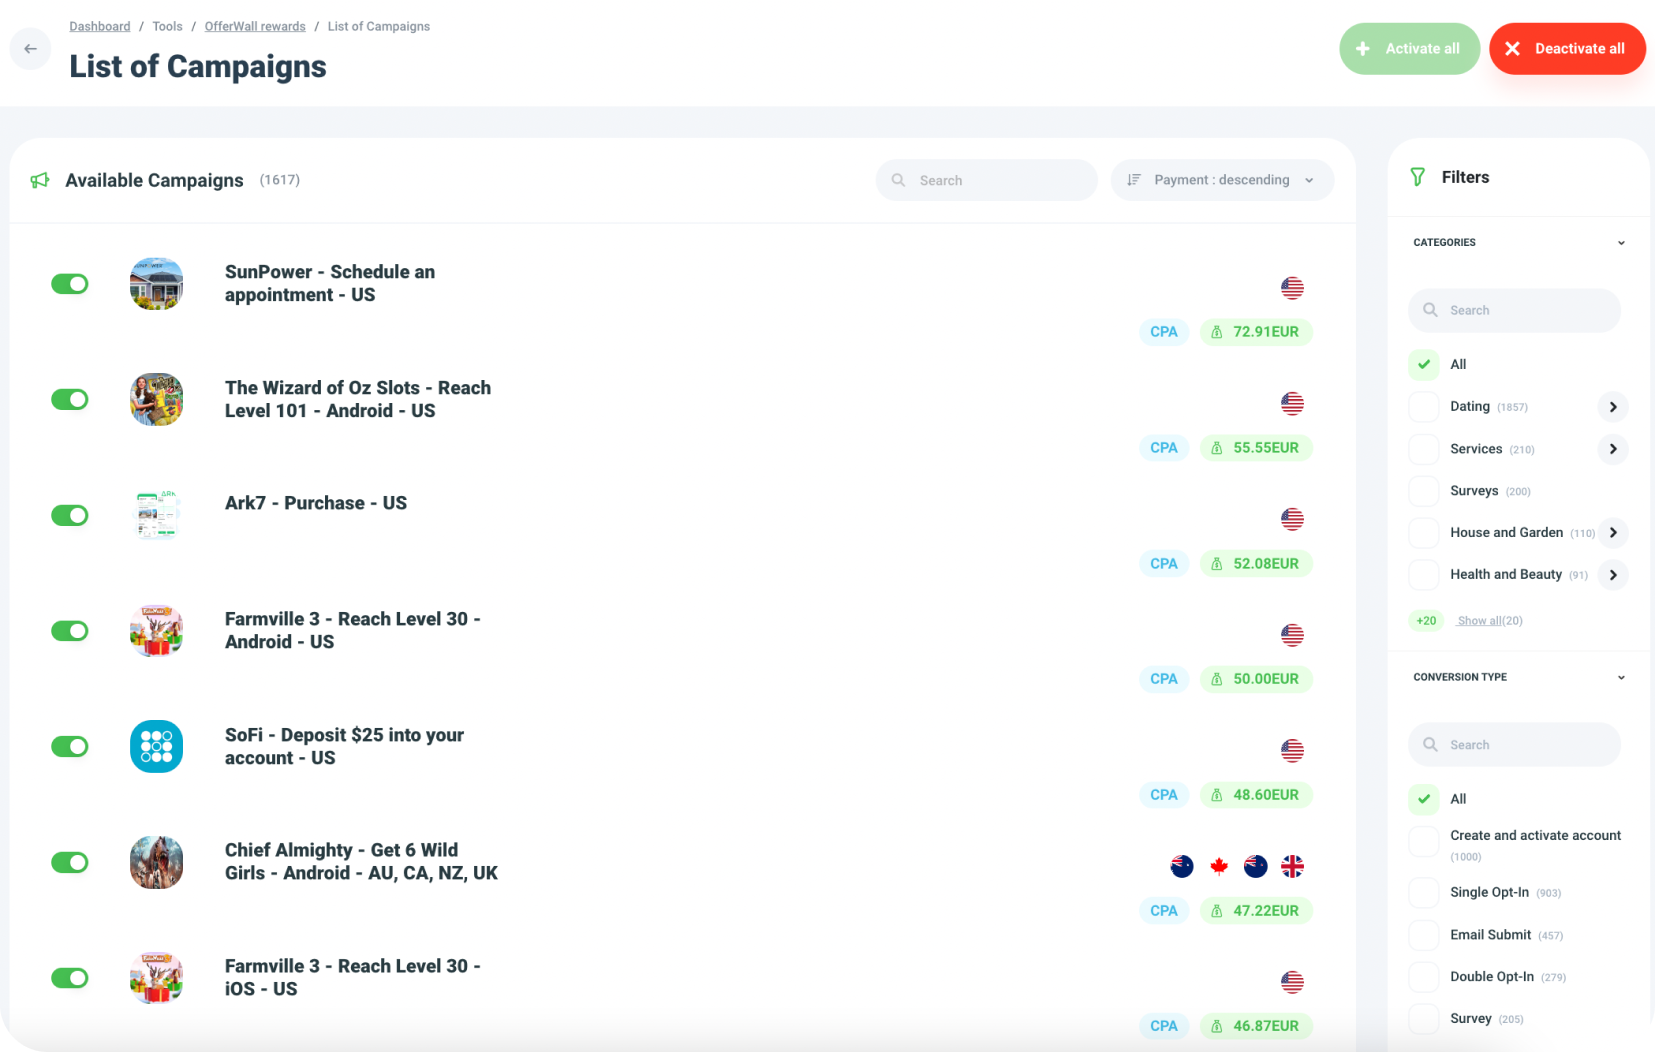
Clicking on a specific offer provides a detailed description. Additional control is gained through the activation and deactivation switch for each offer. This unique solution, rarely available among competitors, allows even more precise offer management.
STEP 7: Configure Postback
Every Offerwall configuration should have its own Postback integration to receive all necessary conversion information. To create an integration, click the Postback option in the configuration view.
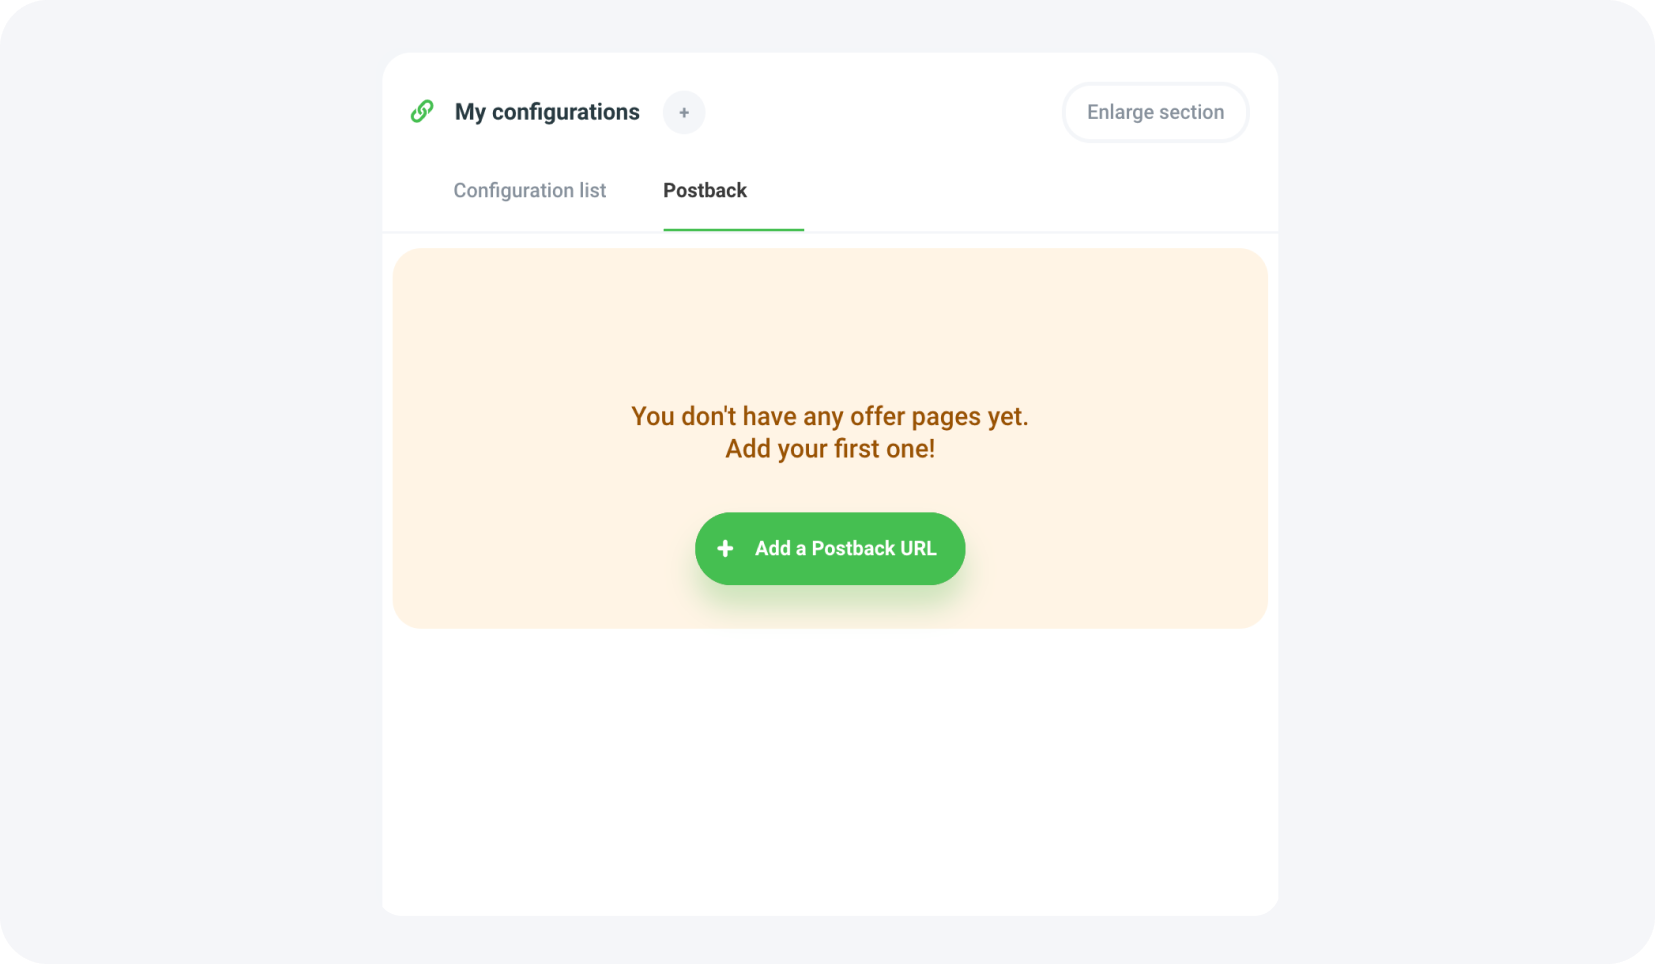
You can specify the conversion status that triggers the Postback or choose the All option, which we strongly recommend. If your system can't handle all statuses, you can configure separate Postbacks for each of them. However, we strongly recommend leaving the All option selected; otherwise, you won't get all the necessary information to manage user points correctly.
Next, insert the link where you want to receive lead status information.
Now choose the parameters you're interested in from the available list, which you'd like to receive as part of the Postback. Here are all the Postback parameters available in MyLead:
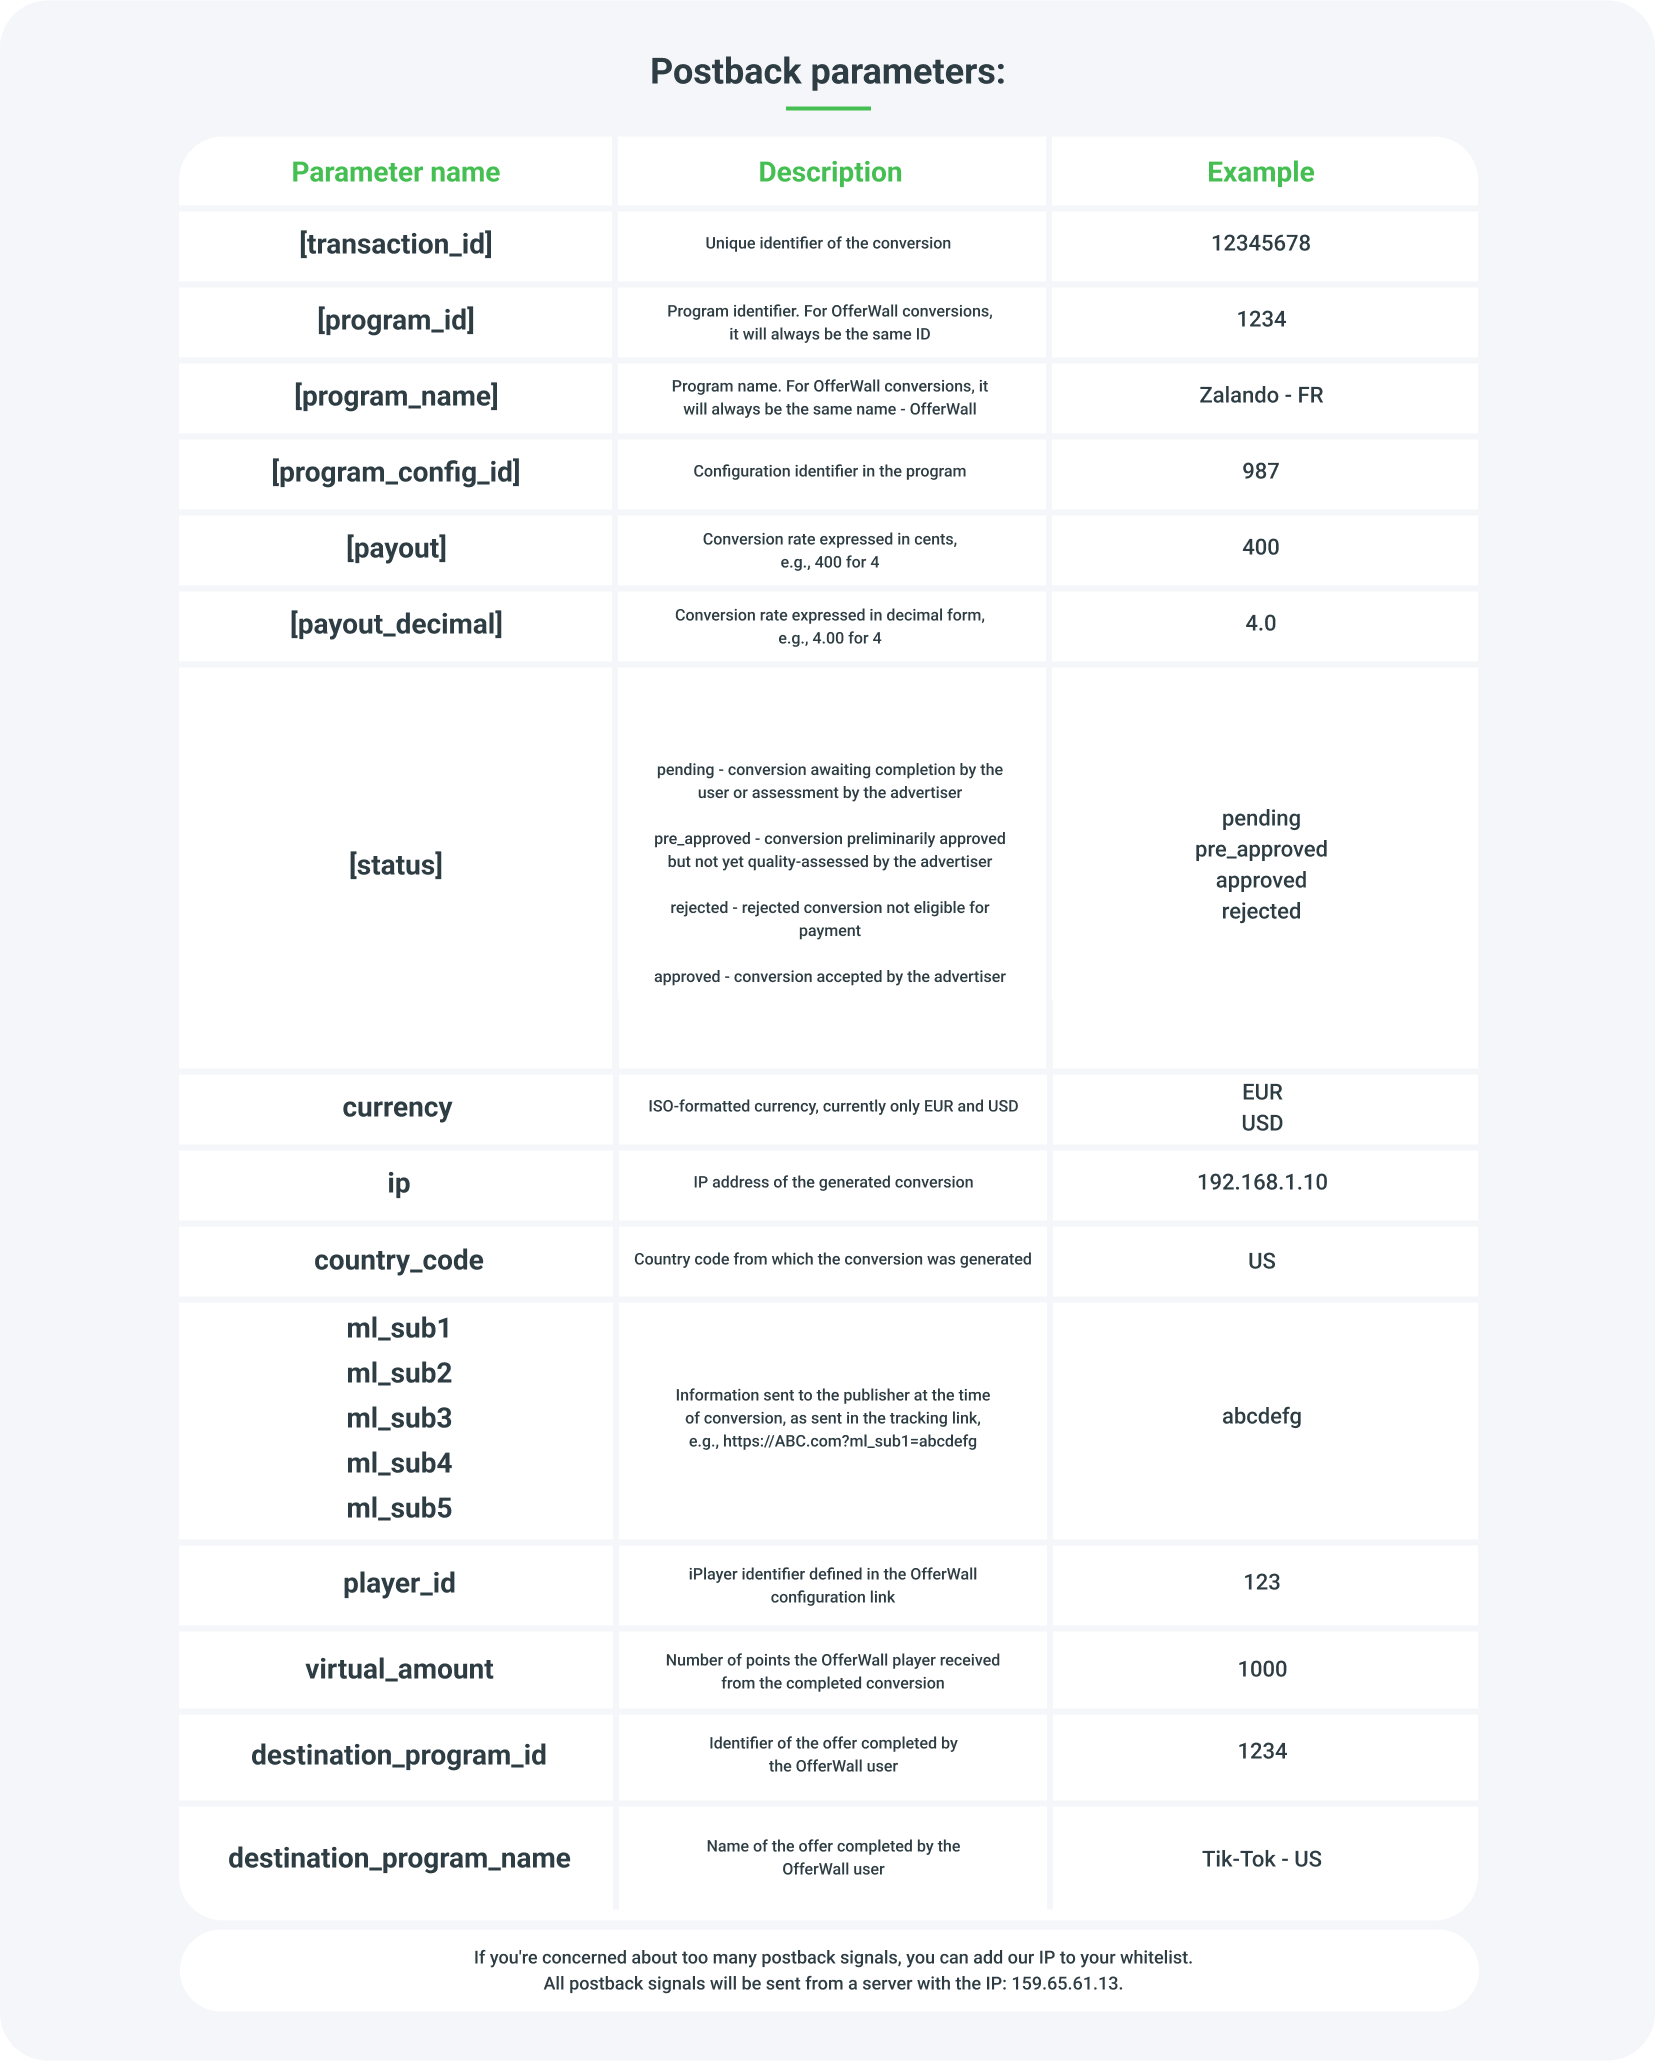
Add the selected parameters to the Offerwall configuration.
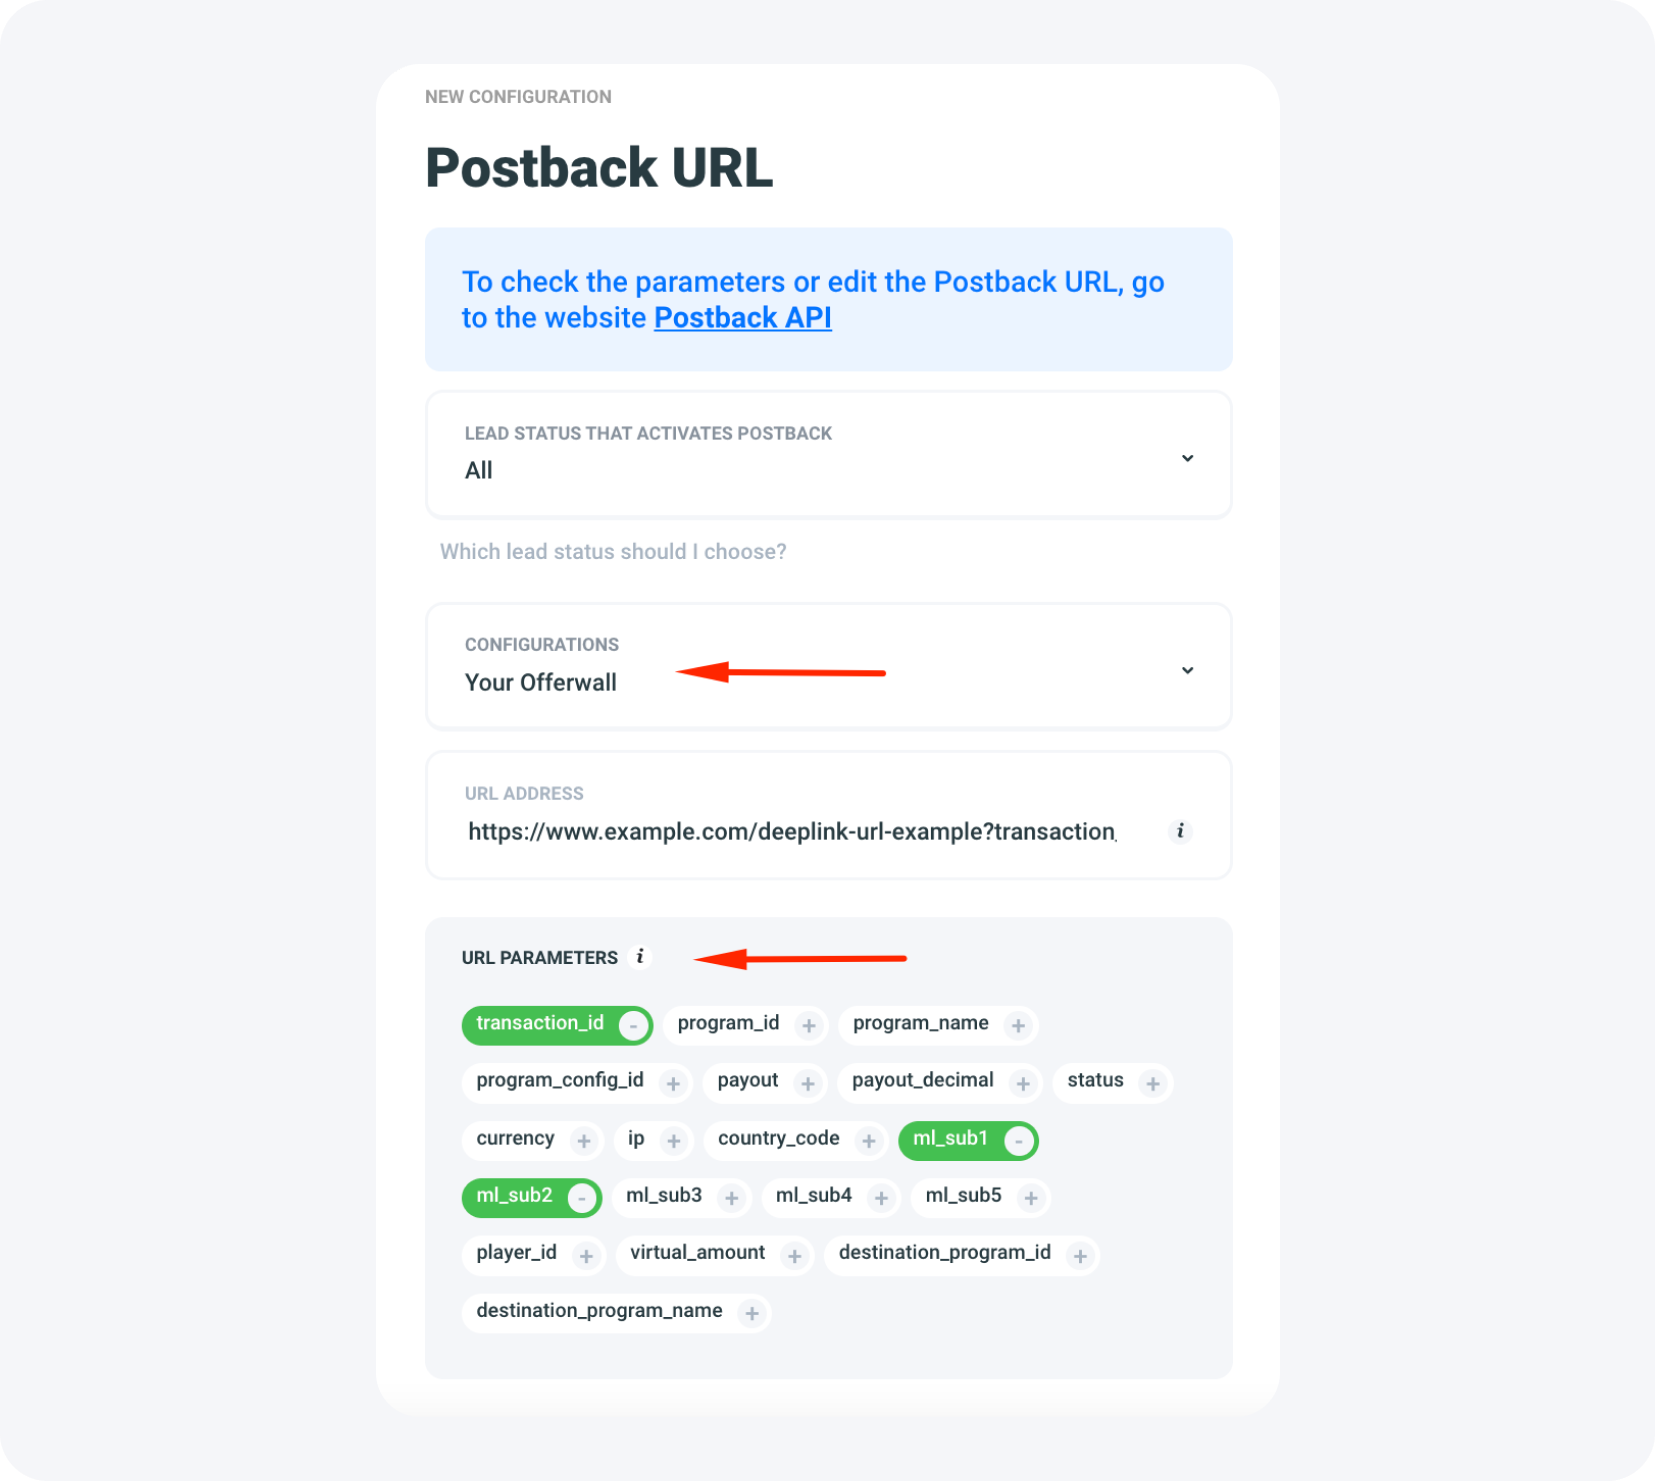
Finish by clicking the Create Postback URL button.
For more information on Postback, go to its subpage by clicking the button below.
STEP 8: Choose additional tracking parameters for the Offerwall
To decide on additional options and then receive the code to embed the Offerwall on the site, go back to the main configuration list view. Click on the three dots icon next to the edit button, then choose Website codes.
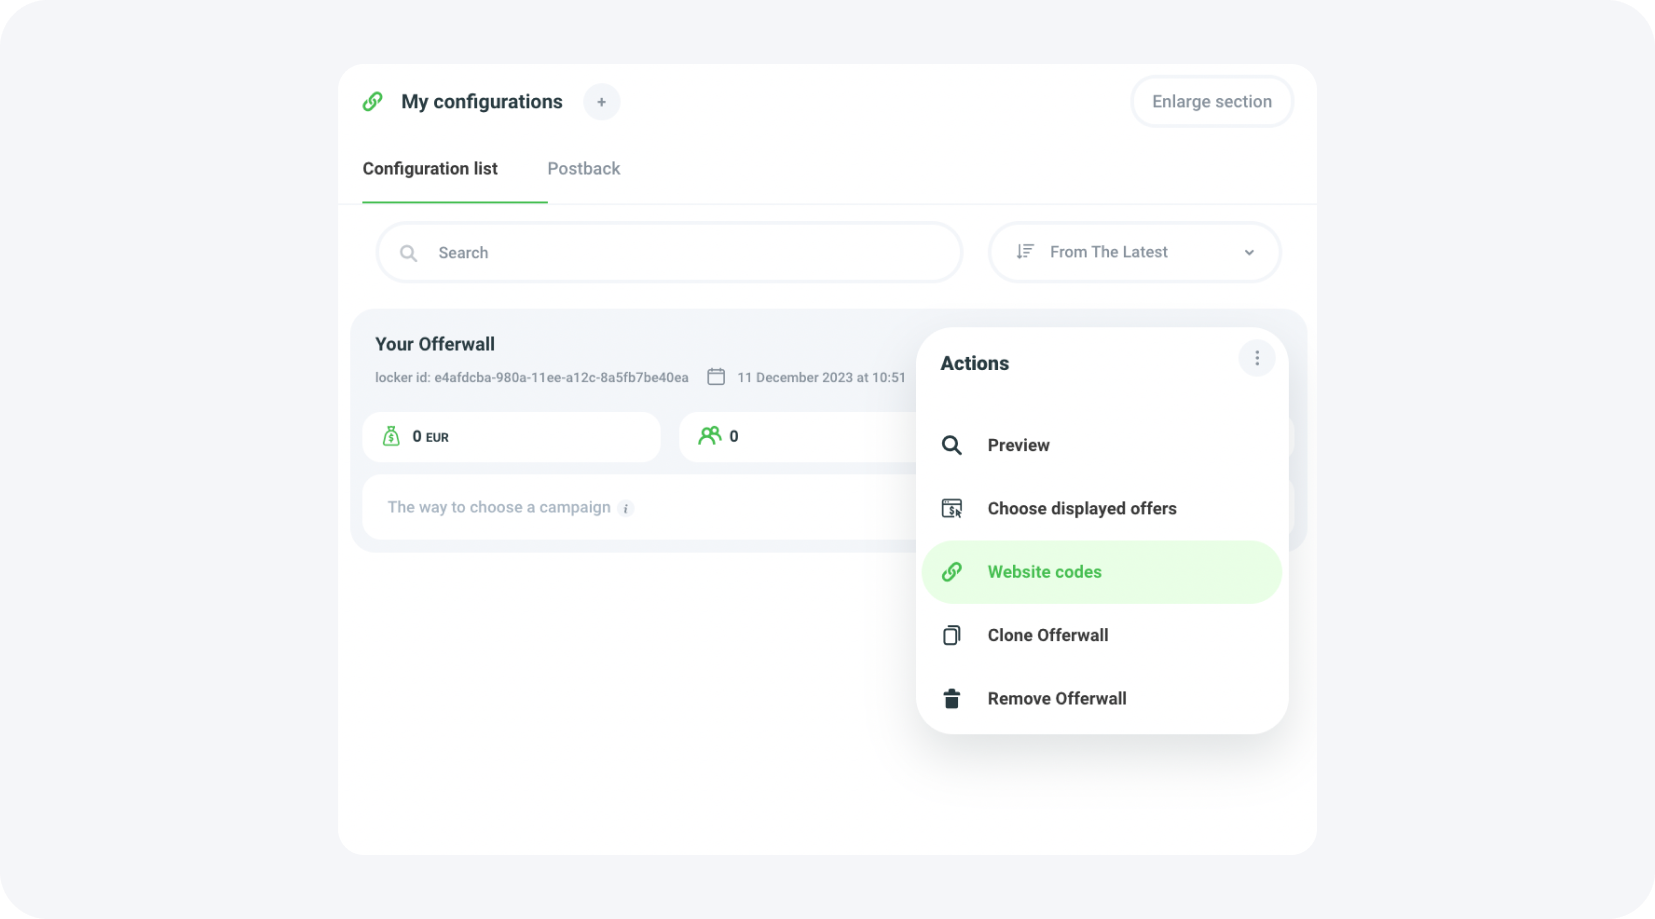
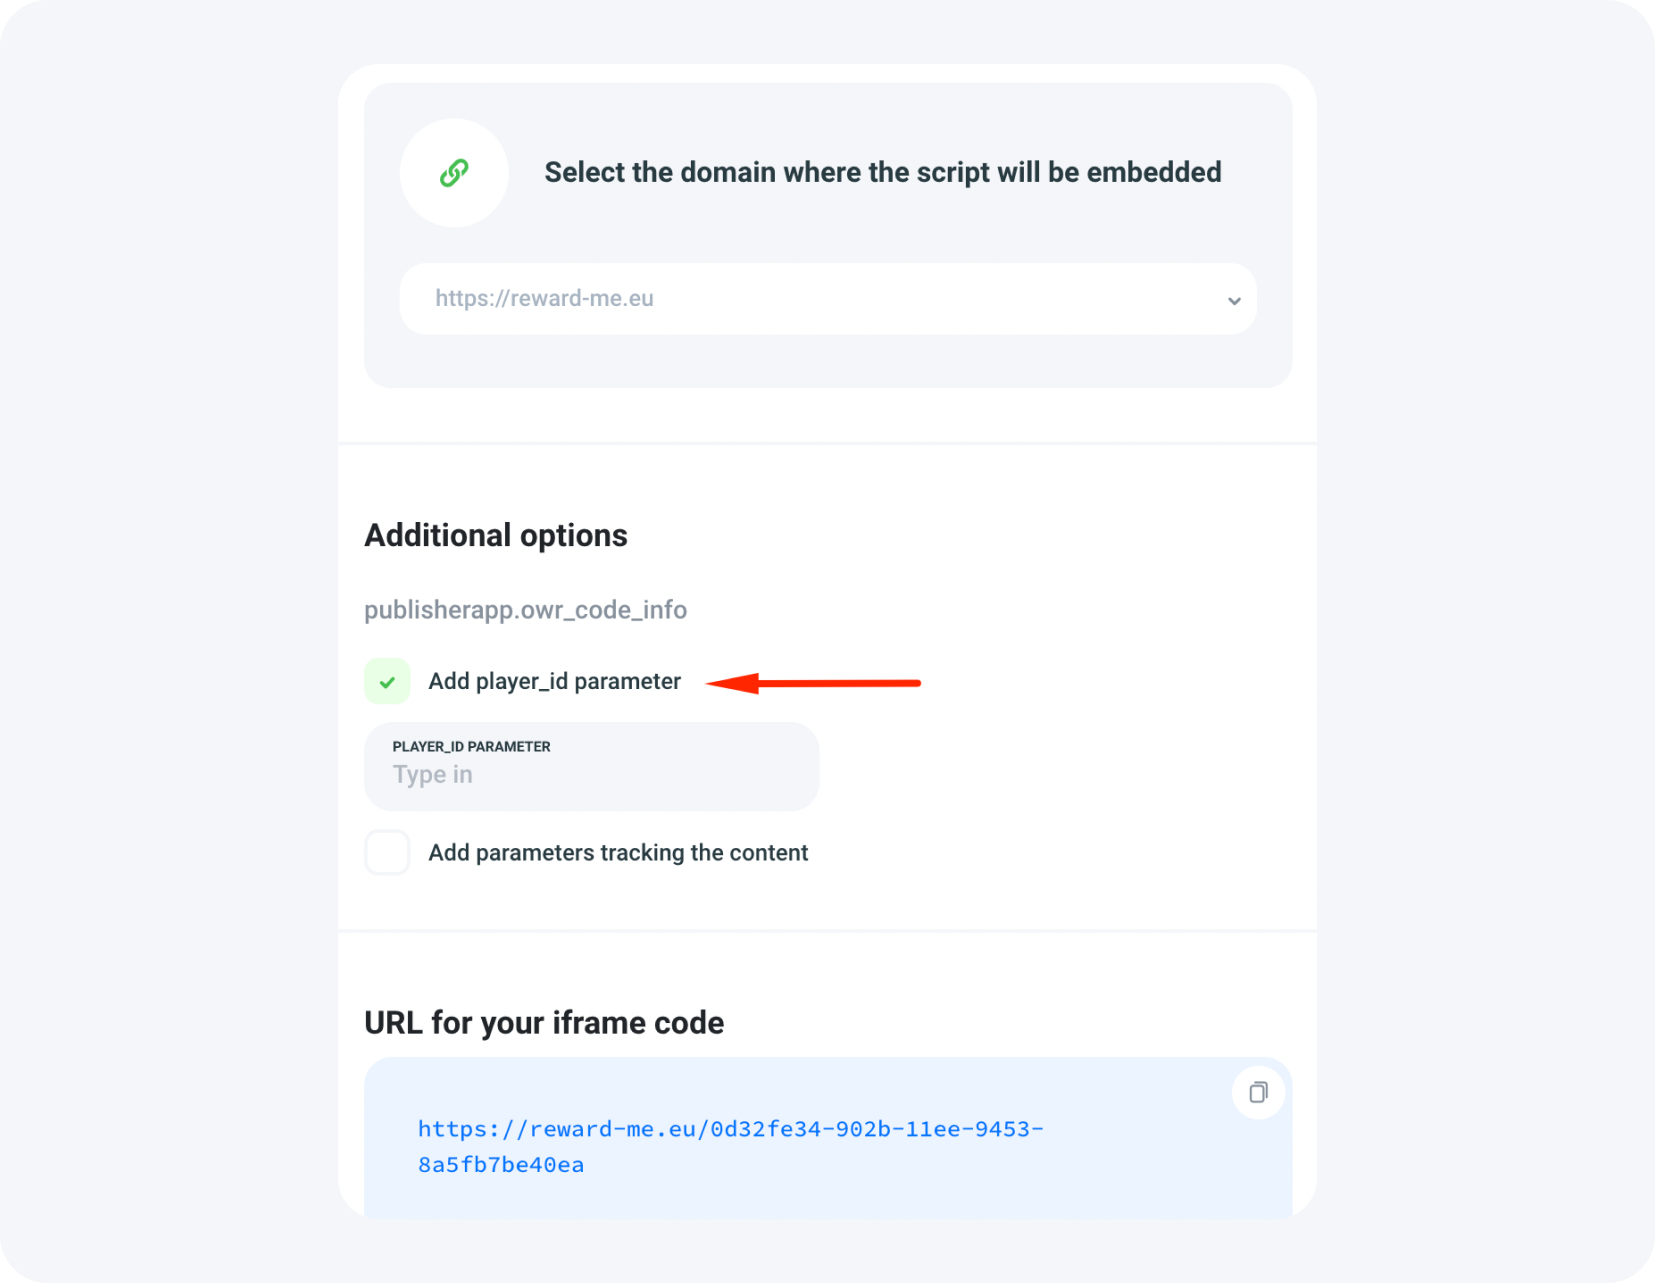
From the available list, choose additional features that your Offerwall should fulfill. You can add the Player ID parameter. Player ID is the unique user identifier in your Offerwall. Assigning the user ID from your system to the Offerwall platform is crucial. Add the 'player_id' parameter with the user's identifier to the Offerwall link. We recommend using the UUID format (Universally Unique Identifier in version 1) or Integer format. Use a sample UUID generator available at https://www.uuidgenerator.net/. If no 'player_id' parameter is passed, it will be automatically generated and saved in the browser during the user's first visit to the Offerwall.
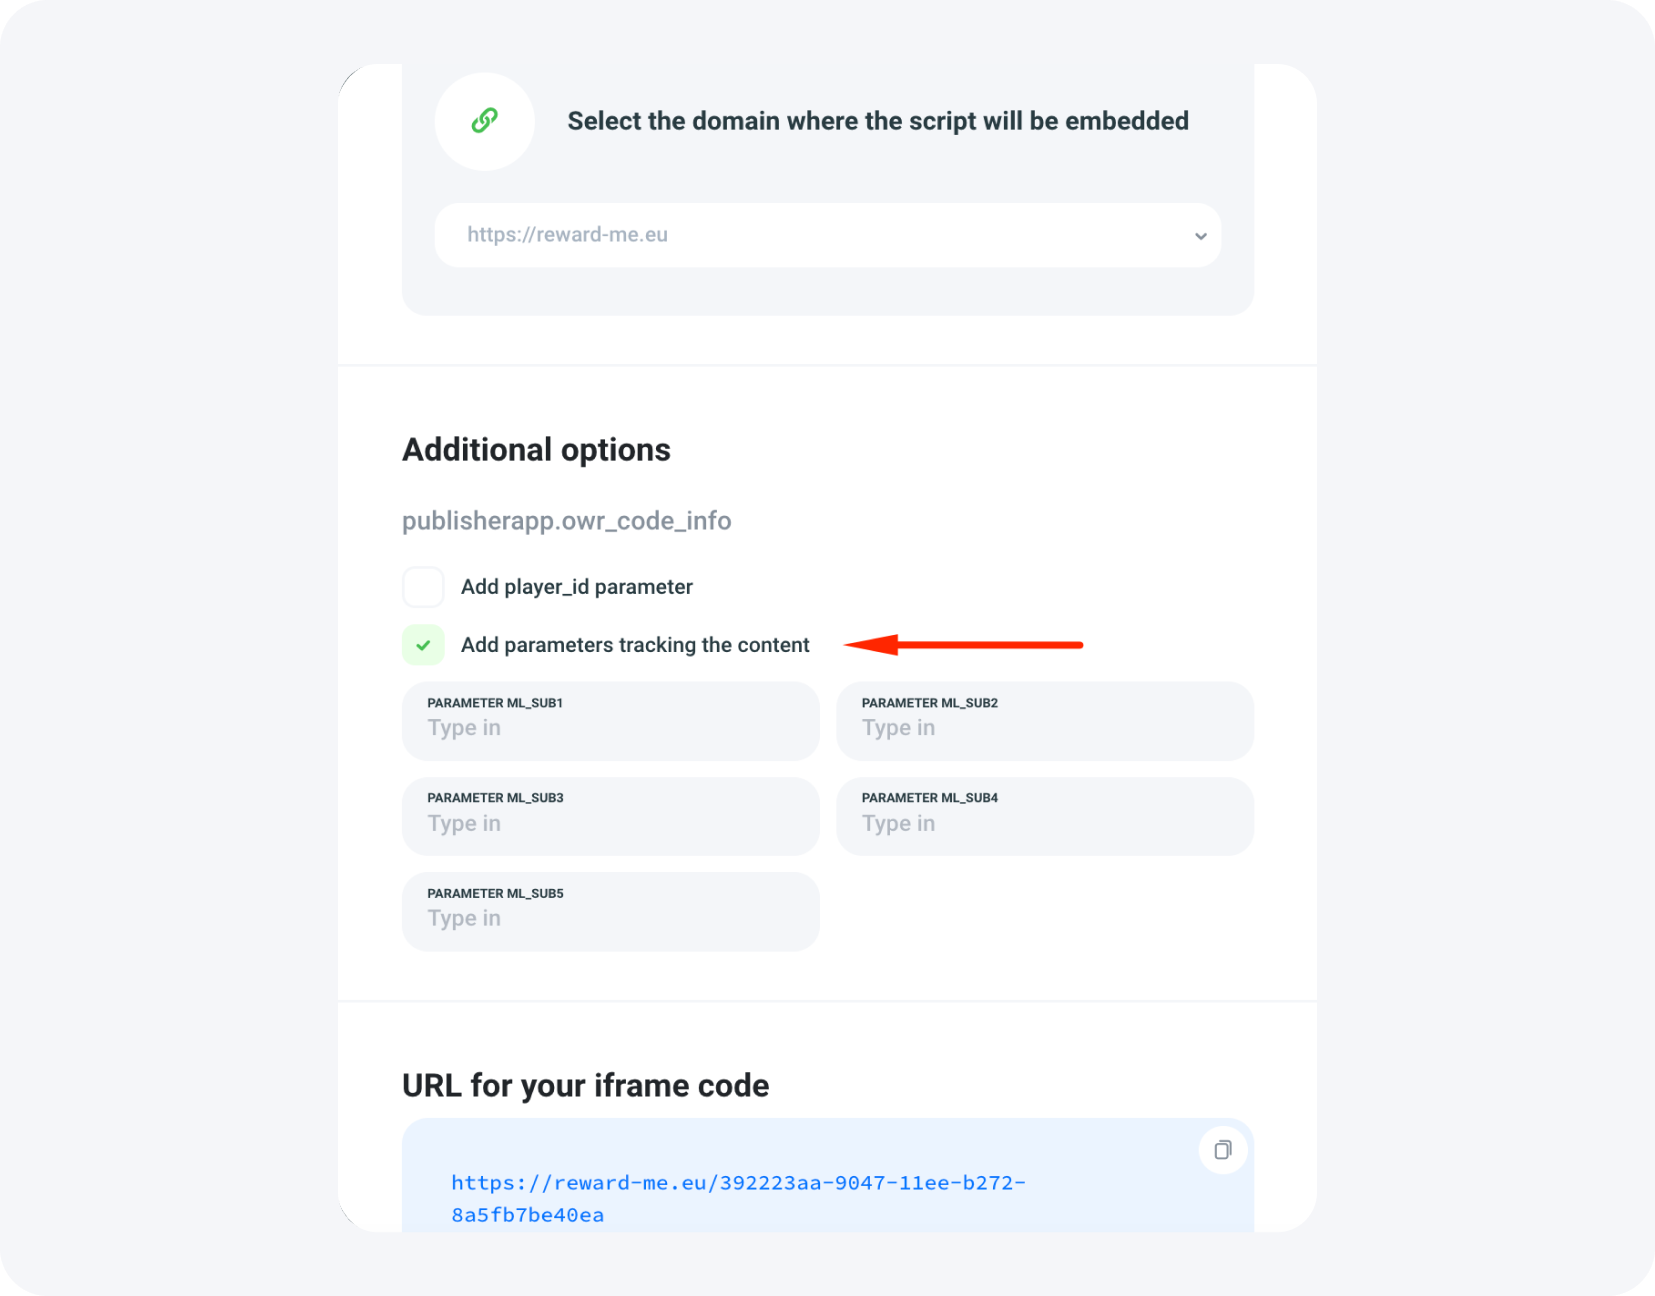
You can also pass tracking parameters to the Offerwall link. By using ml_sub1-5 parameters, you'll have the opportunity to track detailed information about each lead in real-time. Parameters in the Offerwall tracking link allow you to precisely determine the source of each lead. The tracking link means you don't have to generate dozens of different configurations; one with the tracking parameter is enough. This way, you can use only one configuration and promote it on several websites or apps while still having knowledge about the exact origin of a given lead. You can use all this data to make it easier to manage statistics.
STEP 9: Choose the embedding method for your Offerwall
Choose the domain where the script will be embedded. Then decide on one of two methods to place the Offerwall on your site – directly providing the Offerwall configuration URL or using a sample iframe code to place on your website.
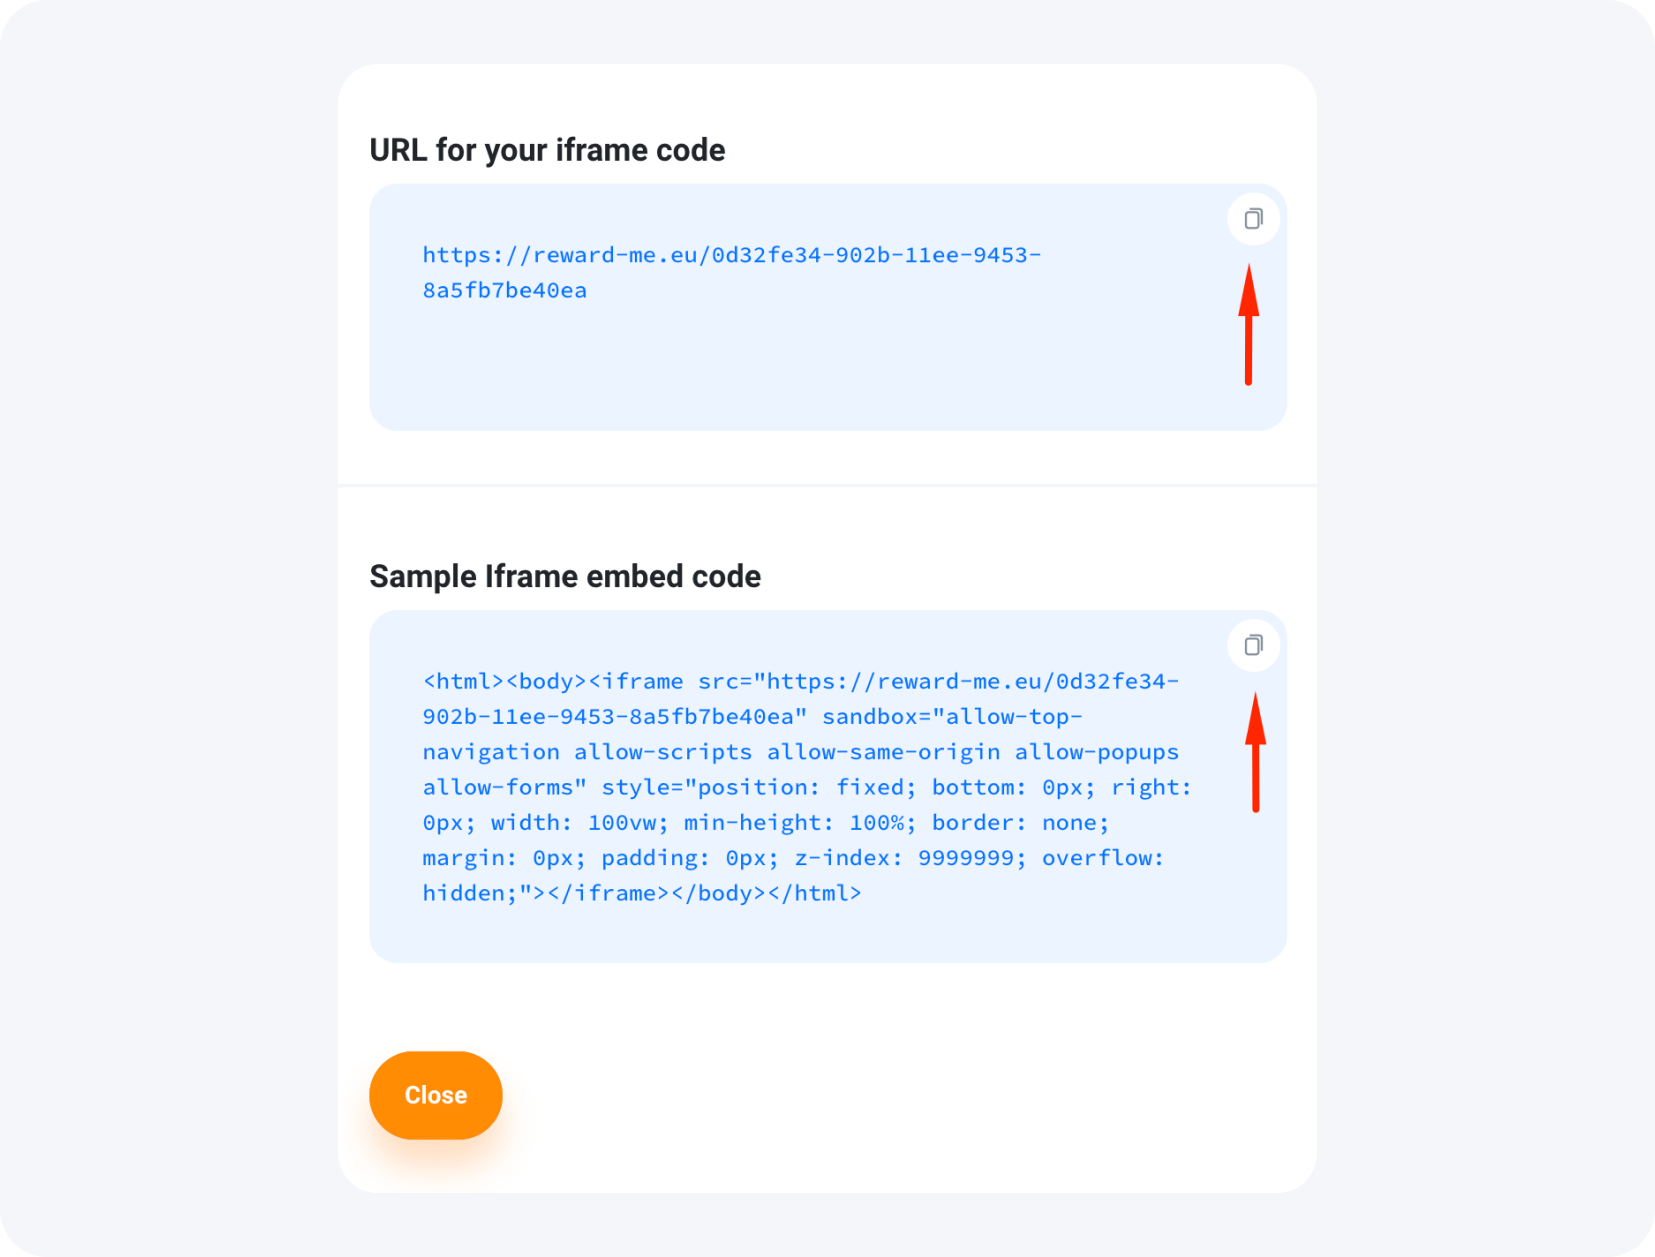
Copy the chosen code and place it on your site.
Final notes
In the MyLead panel, you can add more Offerwall configurations. As their number increases, you can easily search for them by name and adjust their display order using available filters.
It's also worth mentioning that by clicking again on the three dots icon next to the edit button, you'll notice that you can clone the Offerwall using the Clone Offerwall option or delete a specific configuration.
In the main configuration list view, by clicking on the pencil icon, you can edit all parameters mentioned in this article at any time. Additionally, you have the ability to monitor statistics such as profit, number of visits, or the quantity of acquired leads.
If you encounter any difficulties with Offerwall configuration, don't hesitate to contact our support team. We're here to help and ensure a full understanding of the process. Your success is our priority!
Have any questions? Feel free to reach us through our channels.

