
Blog / Guides
How Do You Install Content Lockers on Your Website Step by Step?
This article is updated regularly
Last update:
27 March 2025
Content Lockers are MyLead tools that restrict access to website content, files, or downloads until a visitor completes an action — completing an offer, passing a captcha, or filling out a survey. Installing them takes a few minutes: copy the locker code from the MyLead panel and paste it into a Custom HTML block on your WordPress page.
This guide walks you through installing all three locker types — CPA Locker, Captcha Locker, and File Locker — on WordPress, with the panel method and the manual HTML method side by side.
What you'll learn from this article:
how Content Lockers monetize your website by gating content behind a user action,
how to install the CPA Locker, Captcha Locker, and File Locker on WordPress step by step,
where to copy each locker's code inside the MyLead panel,
how to add a locker manually with a Custom HTML block or a raw HTML file.
What are Content Lockers and how do you install them?
Content Lockers are MyLead monetization tools that gate content, files, or downloads behind a user action. Installation follows one pattern for every type: a code snippet generated in the MyLead panel under Tools → Content Lockers is pasted into a Custom HTML block on your WordPress page, or added manually with a script and button.
Gating premium content filters out passive visitors and rewards genuine interest, which lifts conversion rates. Each completed action — an offer, survey, or sign-up — earns you a commission. See the Complete MyLead Guide - Content Lockers for the full feature set, or read about lead magnets and Content Lockers to plan your gated-content strategy.
| Locker type | What it gates | User action required |
|---|---|---|
| CPA Locker | part of an article or premium content | complete at least one offer (survey, sign-up) |
| Captcha Locker | page content behind verification | pass a human-verification task |
| File Locker | downloadable files | complete an action before download |
How do you install the CPA Locker?
The CPA Locker restricts part of your content until a visitor completes at least one offer from a displayed list, earning you a commission per completed action. Installation on WordPress relies on a code snippet generated in the MyLead panel, pasted into a Custom HTML block, or added manually with a script and button.
Before installing, make sure the locker is set up — the step-by-step locker configuration guide covers that. Picking the right offers also matters: see how to select affiliate programs for Content Lockers.

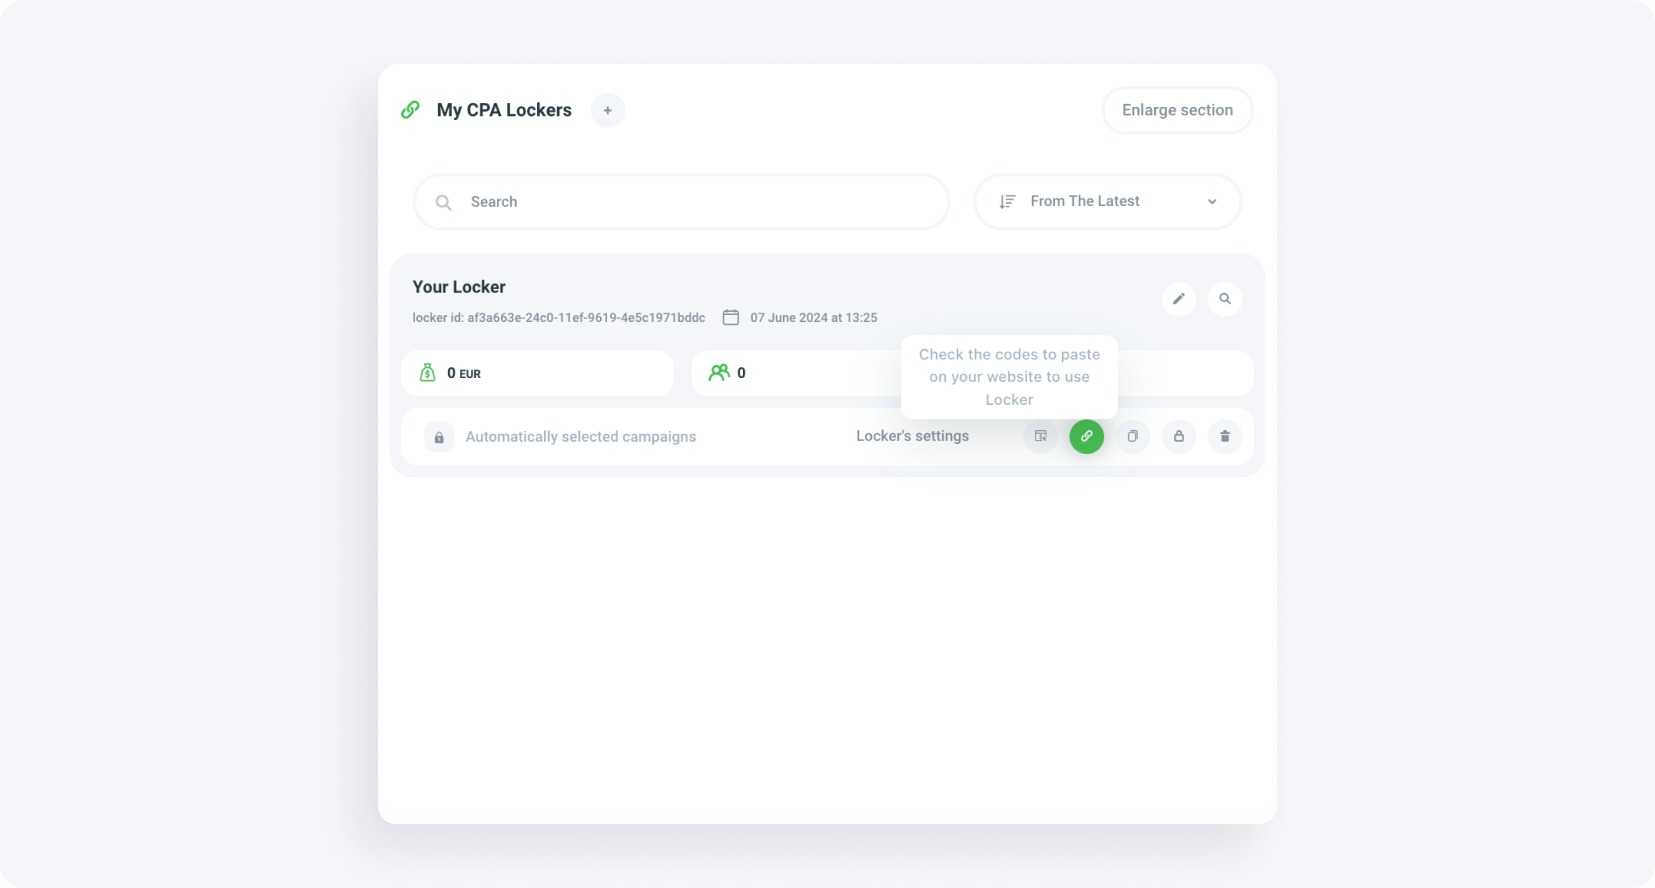
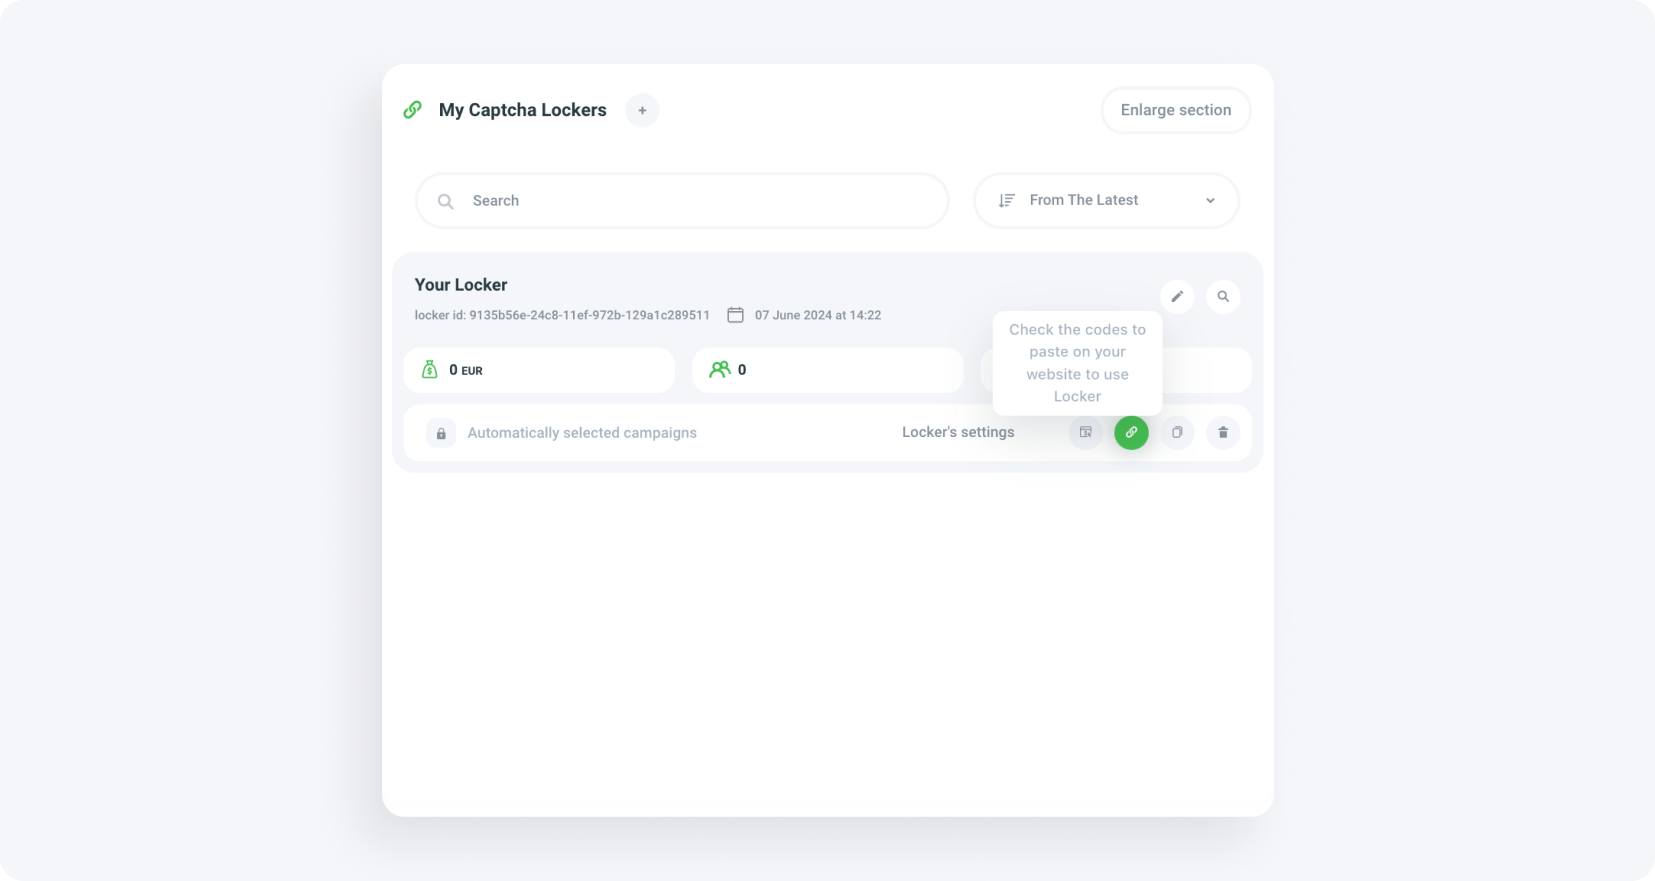
Log in to MyLead and open Tools → Content Lockers → CPA Locker.
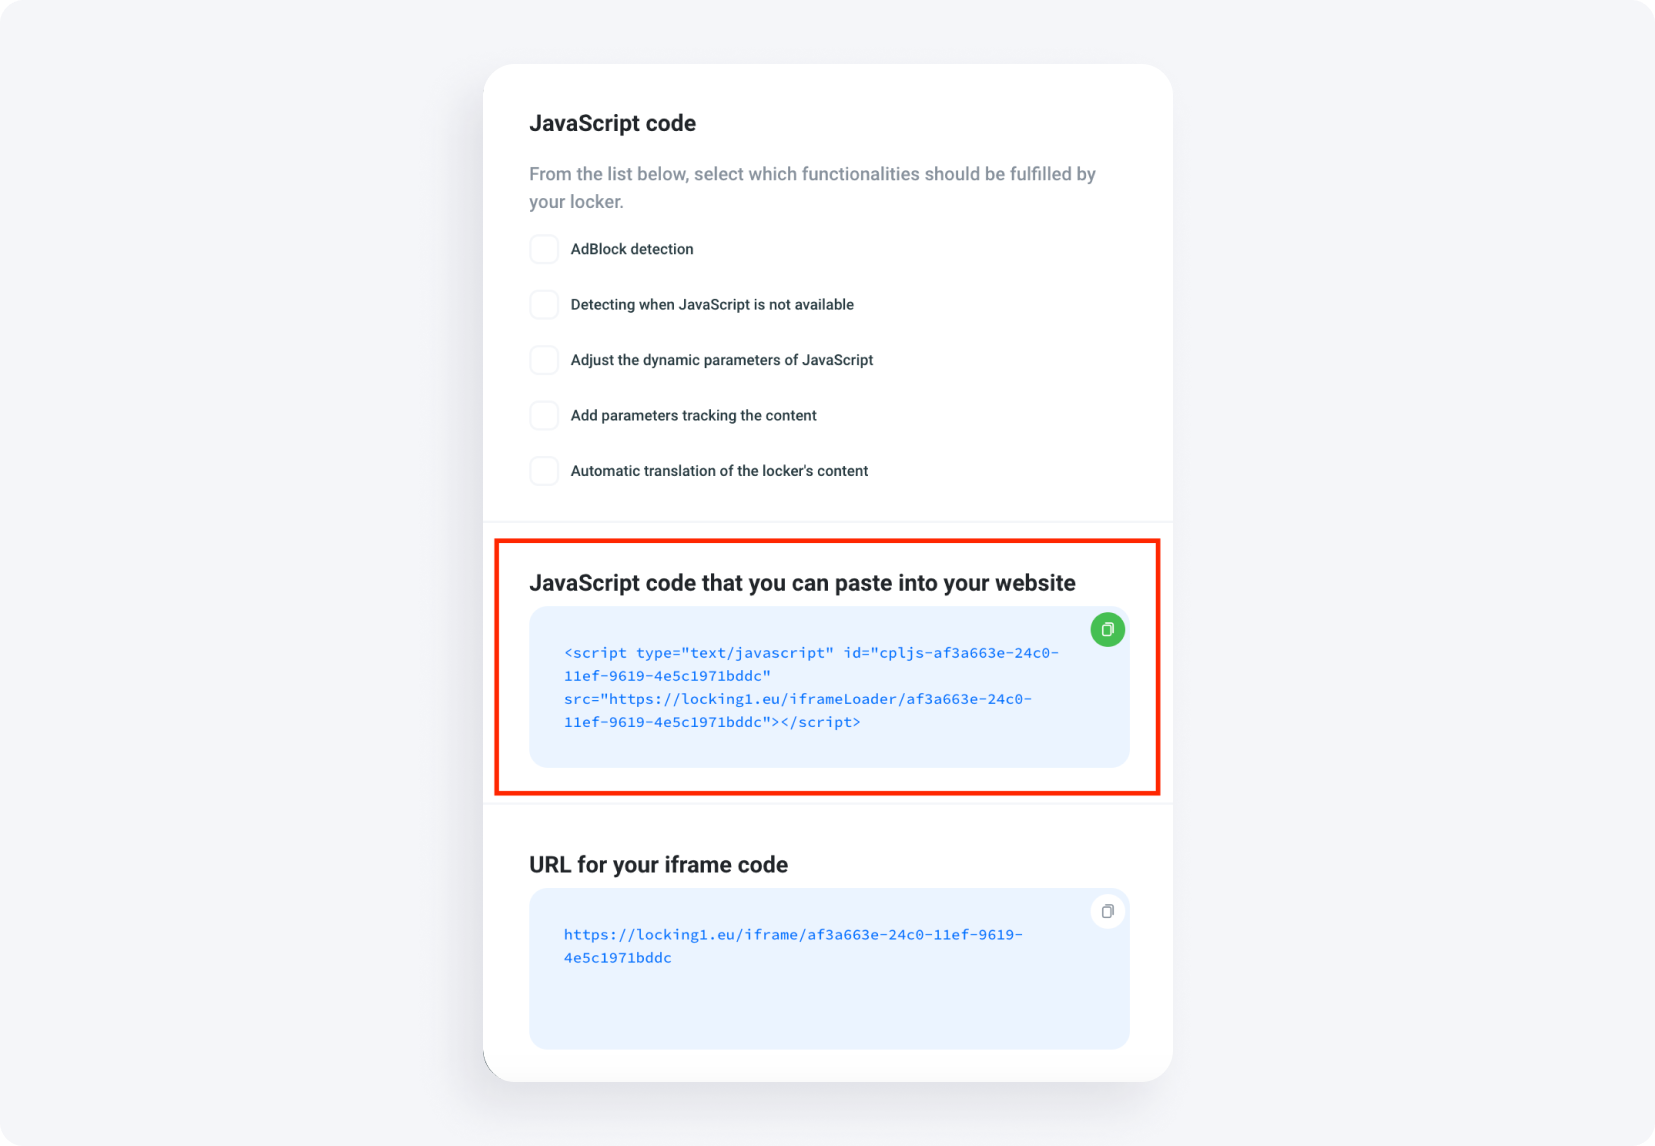
Click the link icon to reveal the codes you paste into your site.
Copy the code, then log in to your WordPress blog.
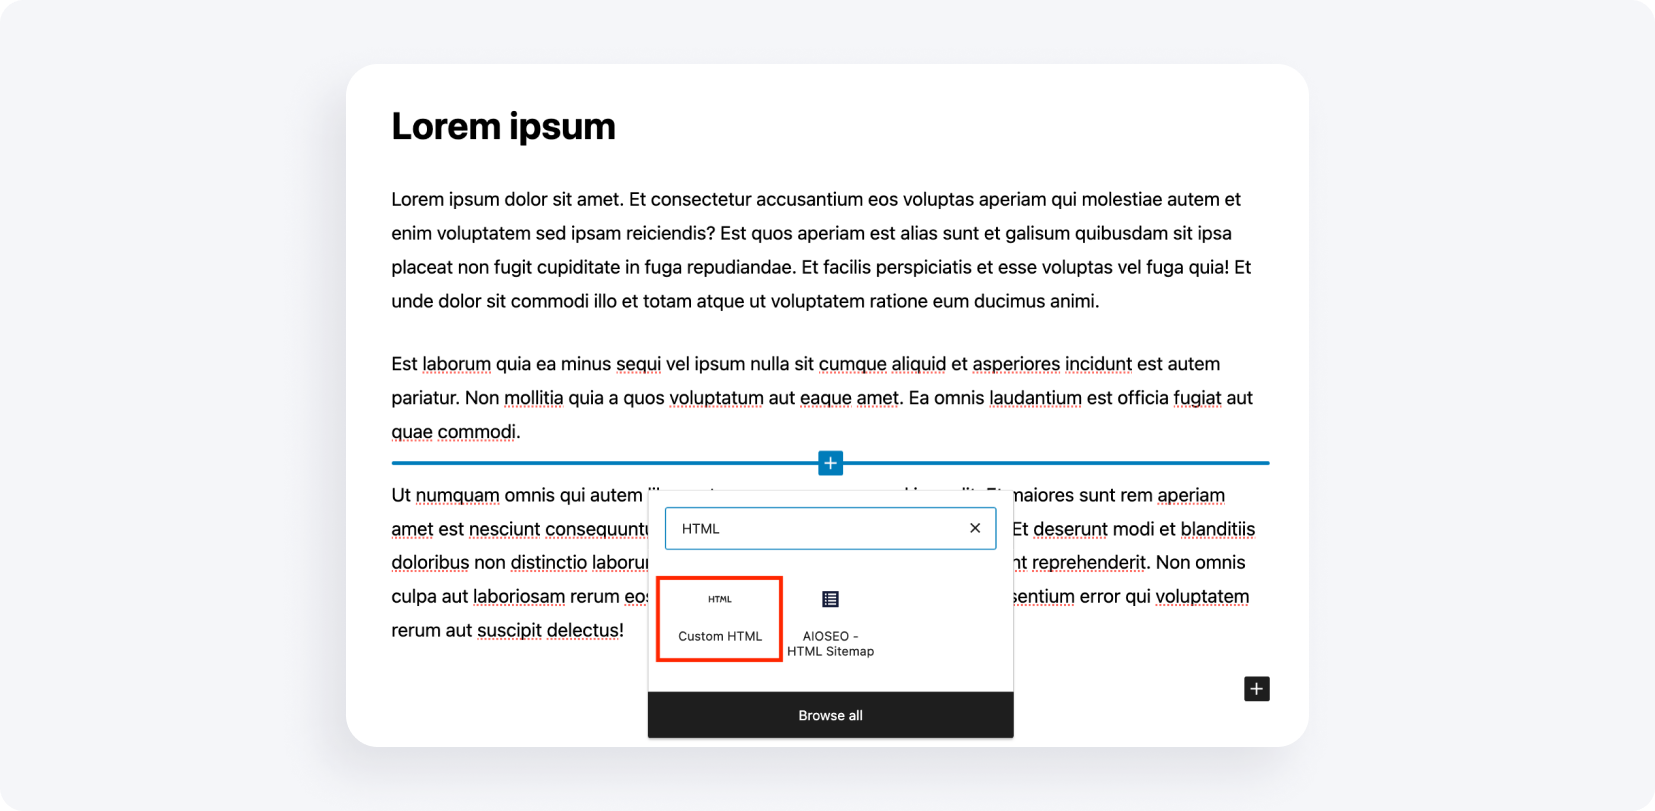
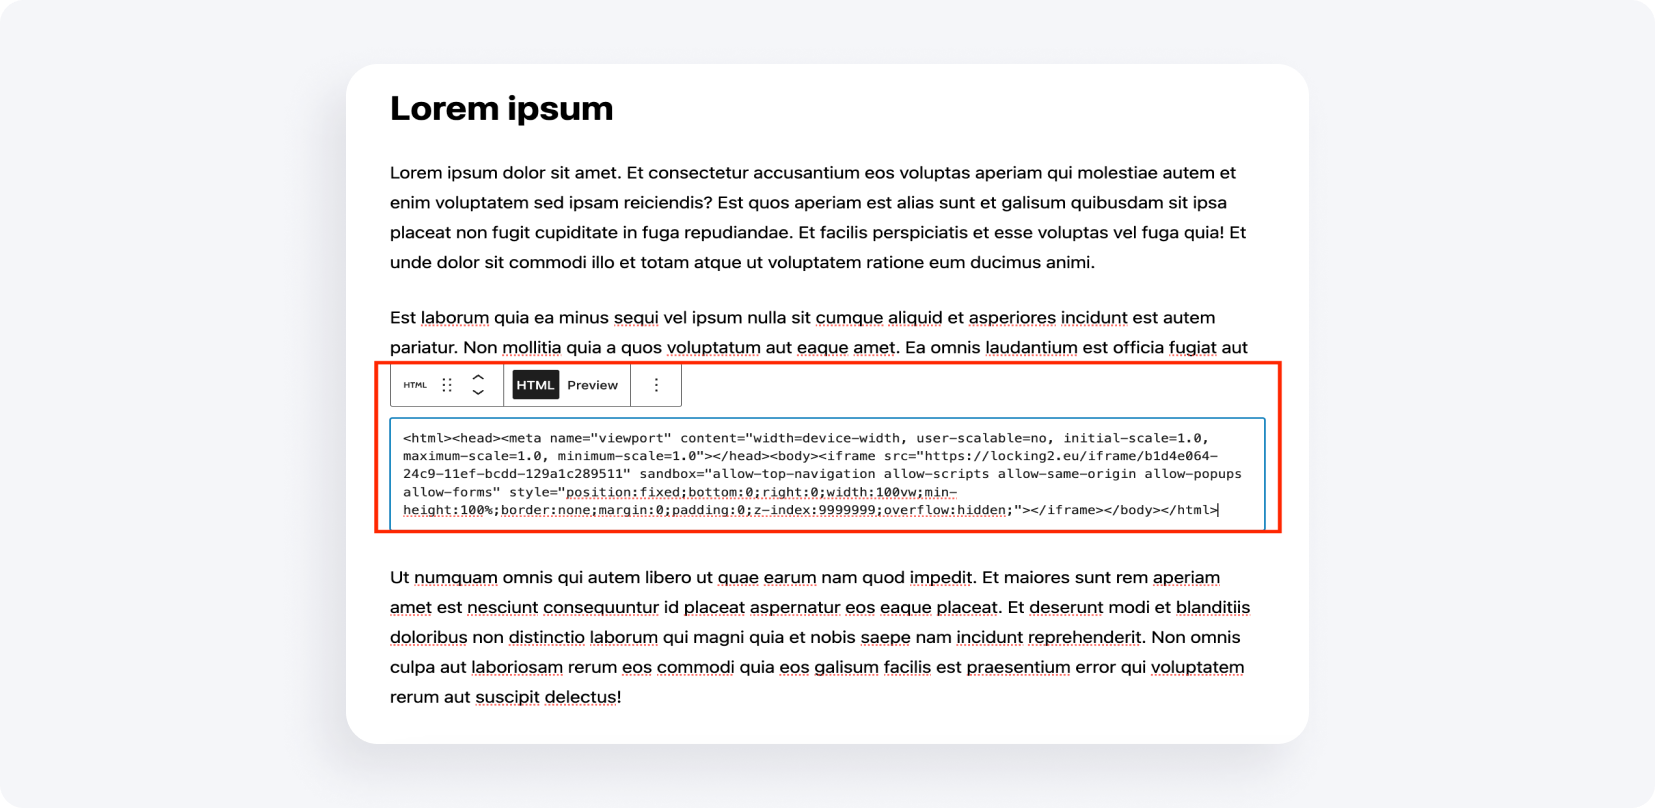
Open the post where you want the locker, add a block, and choose Custom HTML.
Paste the code you copied from the panel.
To add it manually instead, open your site's sample HTML file and insert the script plus the button that opens the locker.
Add the ID from the locker panel, then add the second script found under the code icon — and include https.
How do you install the Captcha Locker?
The Captcha Locker works like reCAPTCHA: a visitor confirms they are human by passing a verification task before the content unlocks. It blocks bot access and keeps interactions genuine. Installation mirrors the CPA Locker — a panel-generated snippet goes into a Custom HTML block, or a manual script-and-button setup.
MyLead's new and improved Content Lockers cover several verification setups, so you can match the locker to your audience.
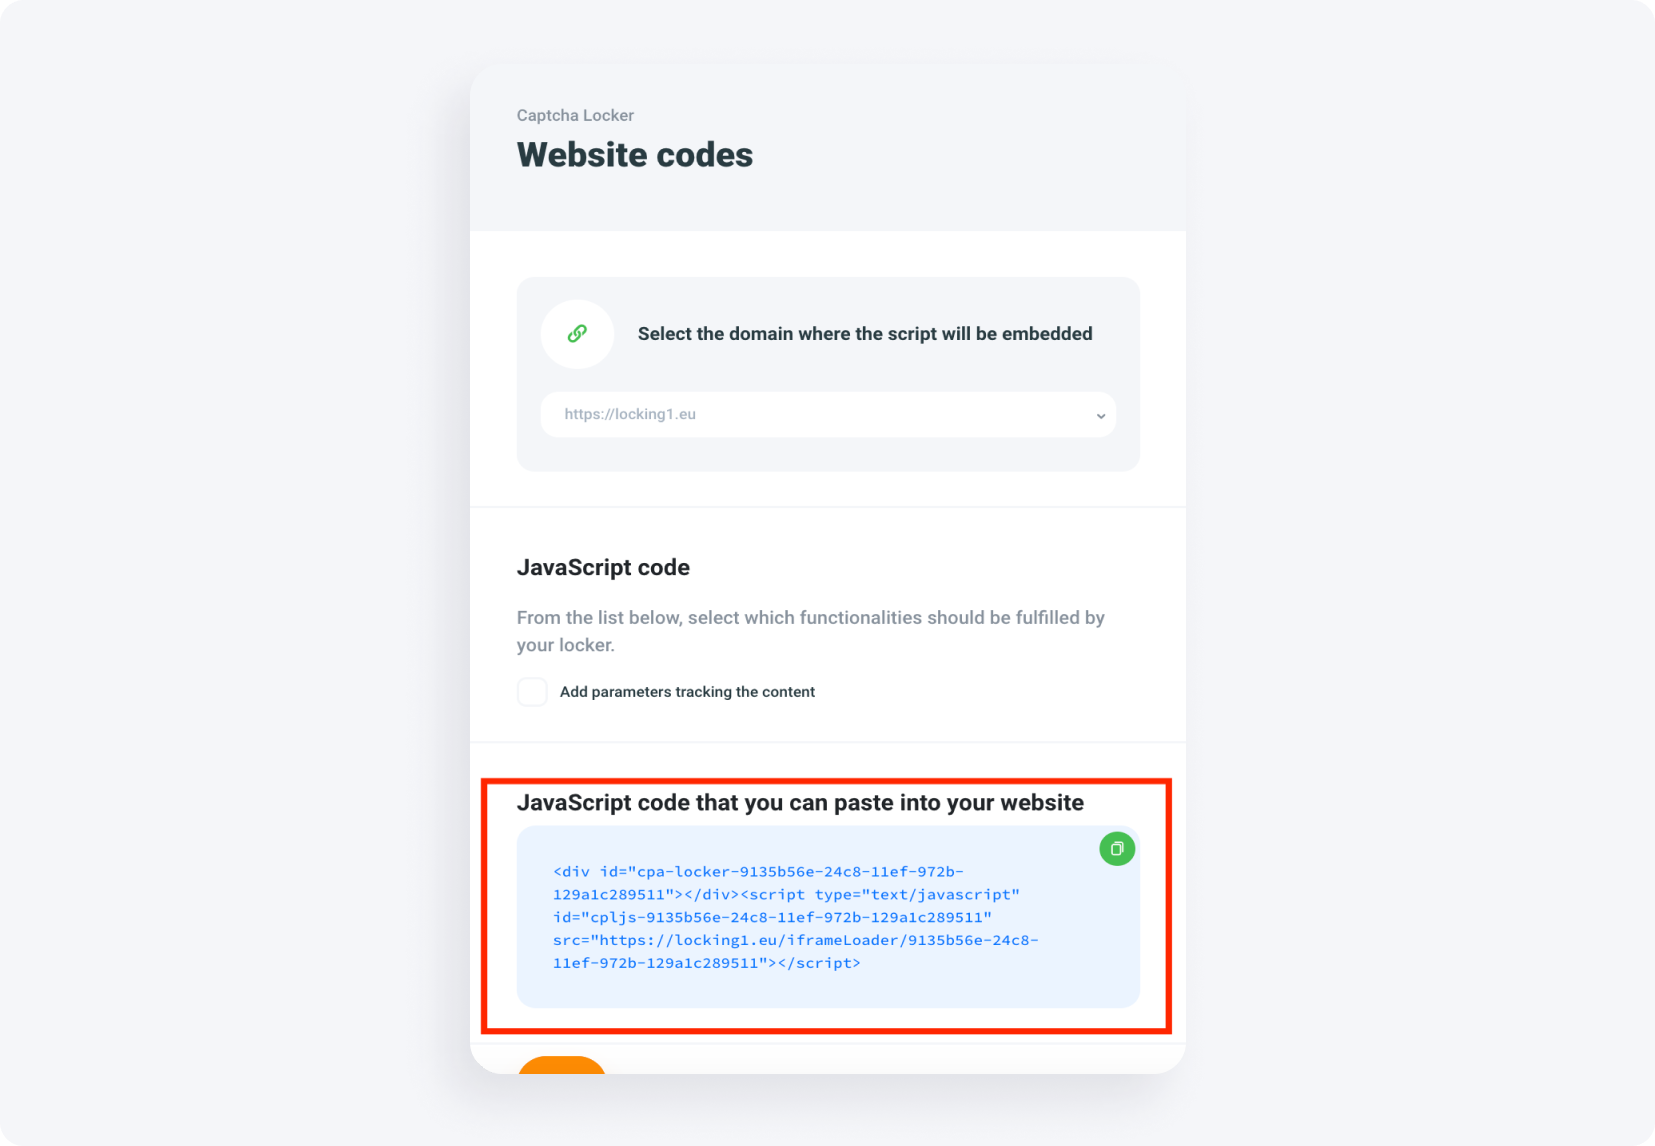
Log in to MyLead and open Tools → Content Lockers → Captcha Locker.
Select the link icon to reveal the codes you paste into your site.
Copy the code, then log in to your WordPress blog.
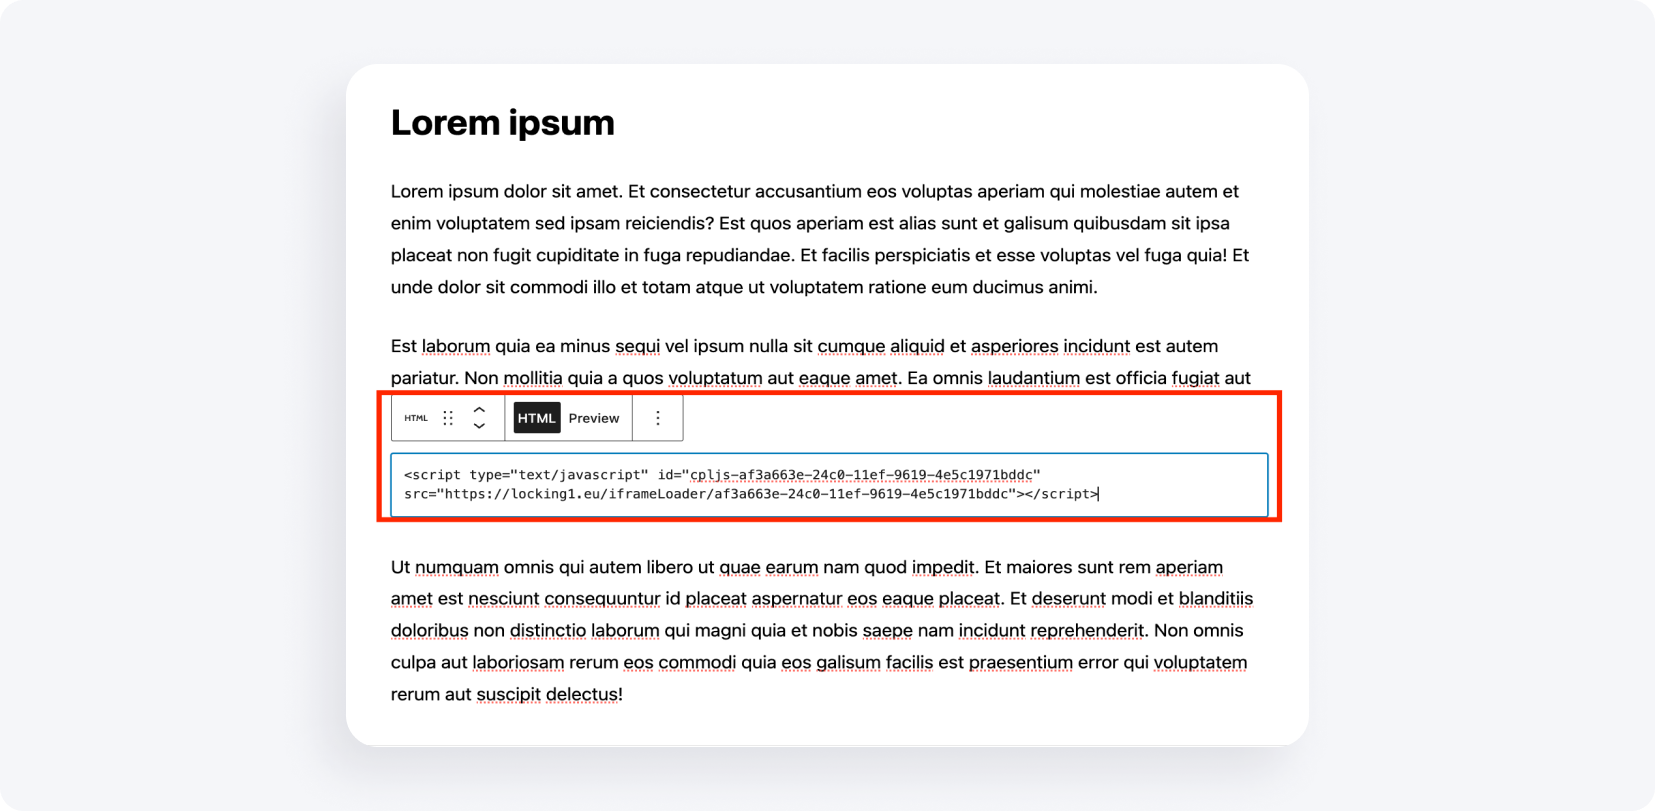
Open the post where the locker should appear, add a block, and choose Custom HTML.
Paste the code you copied from the panel.
To add it manually, open a sample HTML file and insert the script plus the button that opens the locker.
Add the ID from the locker panel, then add the second script under the code icon — and include https.
How do you install the File Locker?
The File Locker restricts access to downloadable files until a visitor completes a specified action, so you monetize every download with a verification step. It suits e-books, templates, and software. Installation follows the same flow — a snippet from the MyLead panel in a Custom HTML block, or a manual script-and-button setup.
See how publishers turn gated content into income in this content locker case study.
Log in to MyLead and open Tools → Content Lockers → File Locker.
Click the link icon to reveal the codes you paste into your site.
Copy the code, then log in to your blog.
Open the post where you want the File Locker, add a block, and choose Custom HTML.
Paste the code you copied from the panel.
To add it manually, open the sample HTML file and insert the script plus the button that opens the locker.
Add the ID from the locker panel, then add the second script under the code icon — and include https.
Key takeaways
Every MyLead locker installs the same way: copy the panel code into a WordPress Custom HTML block, or add it manually with a script and button.
The CPA Locker pays a commission each time a visitor completes an offer to unlock content.
The Captcha Locker blocks bots by requiring human verification before content loads.
The File Locker gates downloads — ideal for e-books, templates, and software.
Configure each locker in the MyLead panel before generating its installation code.
FAQ
1. What is a Content Locker?
A Content Locker is a tool that hides content, files, or downloads until a visitor completes an action, such as an offer or captcha. You earn a commission for each completed action.
2. Do Content Lockers work outside WordPress?
Yes. The locker code is plain JavaScript, so you can paste it into any site that accepts custom HTML — static HTML pages and most CMS platforms included.
3. Is the MyLead Content Locker free to use?
Yes. Generating and installing the CPA, Captcha, and File Lockers is free; you are paid a commission whenever a visitor completes the required action.
4. How do you add the locker code in WordPress?
Open the post in the WordPress editor, add a new block, choose Custom HTML, and paste the snippet you copied from the MyLead panel.
Summary
Installing Content Lockers on WordPress comes down to one repeatable process: configure the locker in MyLead, copy its code, and paste it into a Custom HTML block — or add it manually with a script and button. The CPA, Captcha, and File Lockers each gate a different type of content, but the setup is identical. Log in to MyLead, generate your first locker code, and start monetizing your content today.
Have any questions? Feel free to reach us through our channels.